
Share

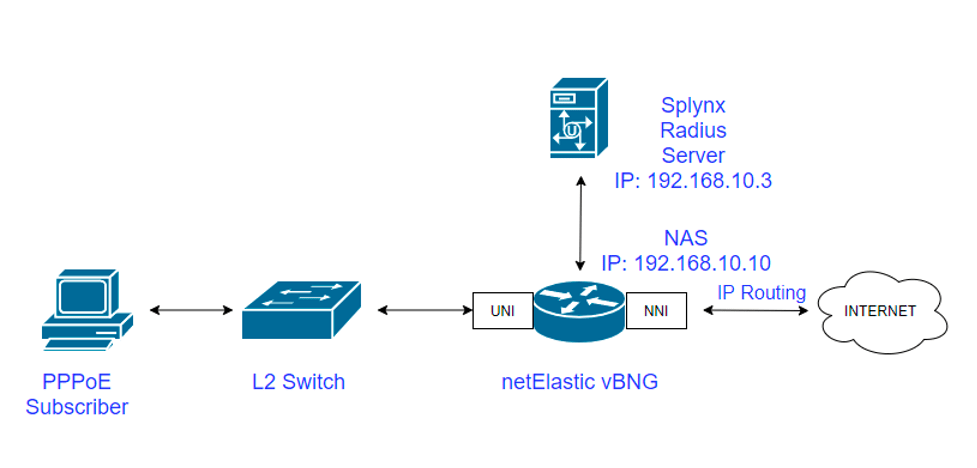
In this article, we’ll display how to properly configure the virtual Broadband Network Gateway (vBNG) solution from netElastic along with its integration with Splynx ISP Framework. We’ll demonstrate how the Splynx Radius server can be used for complete AAA (Authentication, Authorization & Accounting) coverage of your customers.
So, let’s get started.
All the configuration below is done on freshly installed instances of vBNG Router, vBNG Manager, and Splynx that are up and running. In this guide, we’ll be creating a test user with certain parameters using our Splynx solution and then connecting him over the PPPoE session to the Internet through a vBNG device.
with Radius authentication, authorization, and accounting.
The process of configuring PPPoE connections on the vBNG with Radius authentication, authorization, and accounting involves:
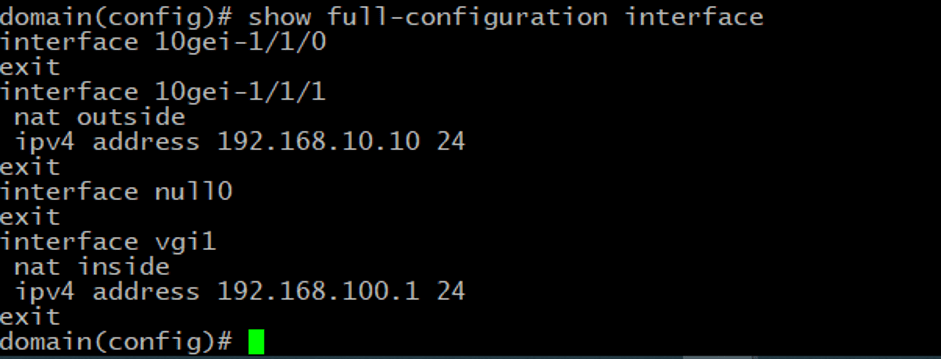
We’ll start with the interfaces first. As seen on the screenshot below, our vBNG is installed on a server with two 10Gb NICs:
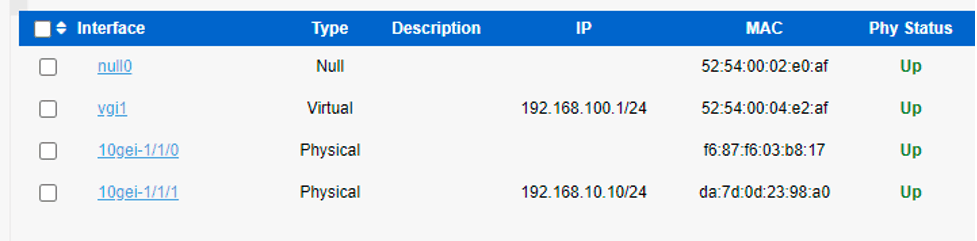
We assigned the following IP address 192.168.10.10 to 10gei-1/1/1, so the interface setup looks the following way:
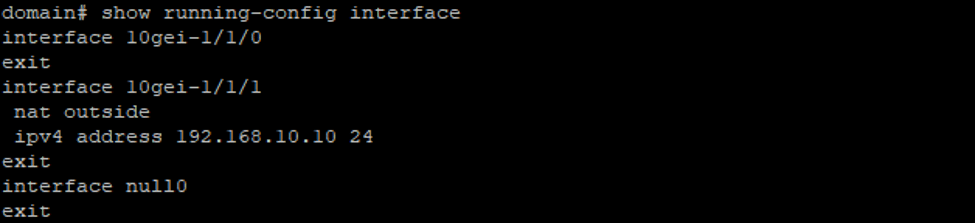
Please note there is also a NAT-related parameter here, we’ll be discussing it further in this guide.
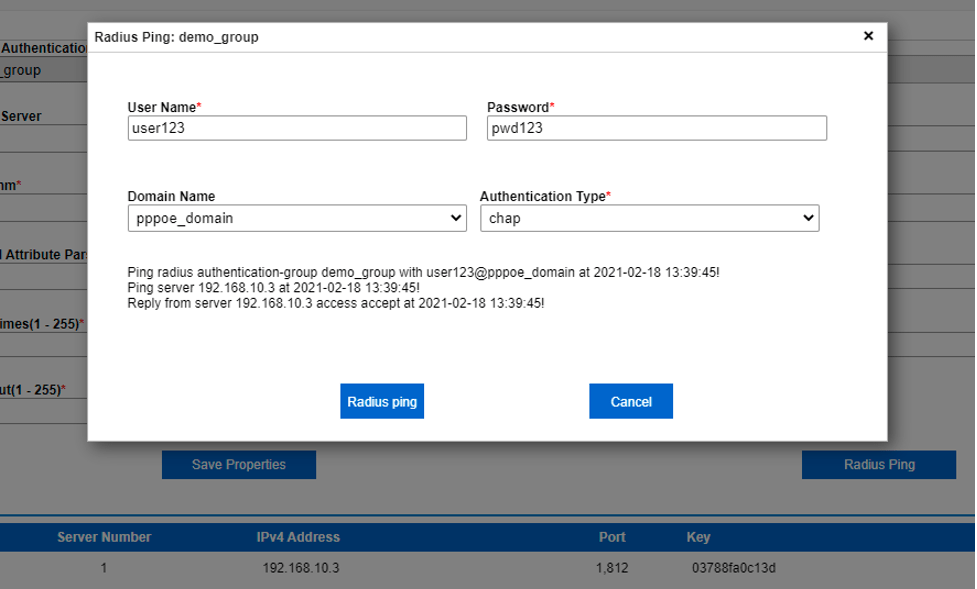
Next, moving on to RADIUS Authentication group creation, which is used for authorization as well. We created ‘demo_group’ with the following parameters:
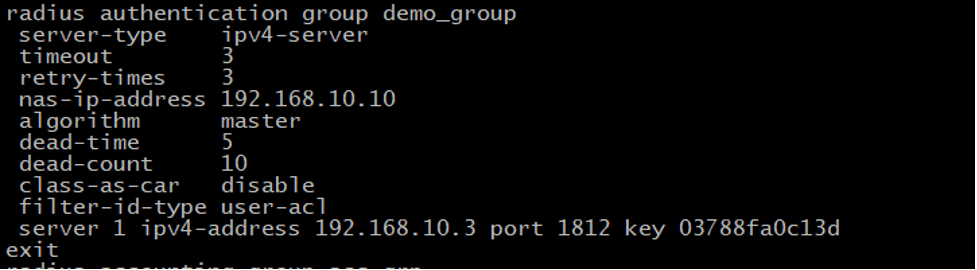
Our Radius Server is at the 192.168.10.3 IP address as per the diagram, uses default port 1812 and the key above. Please change these values as per your own setup. If configured properly, you should be able to test the connection to the Radius server in vBNG Manager GUI.
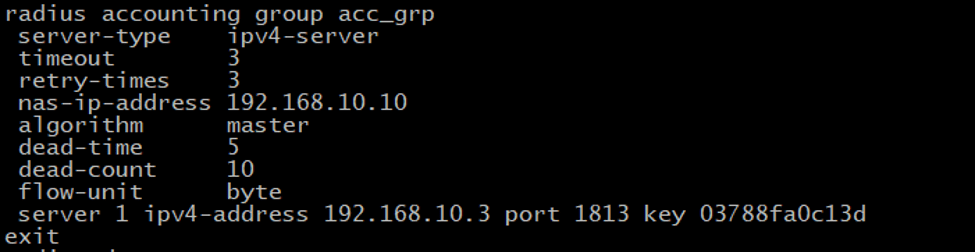
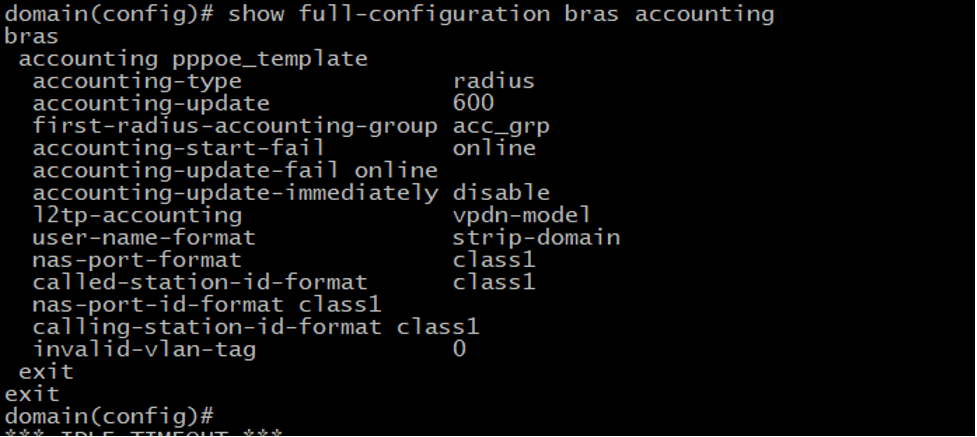
Now we create RADIUS Accounting group ‘acc_grp’ with the following configuration. It’s similar to the Authentication group above, except it uses port 1813.
We also need to enable Radius accounting under the Radius configuration.

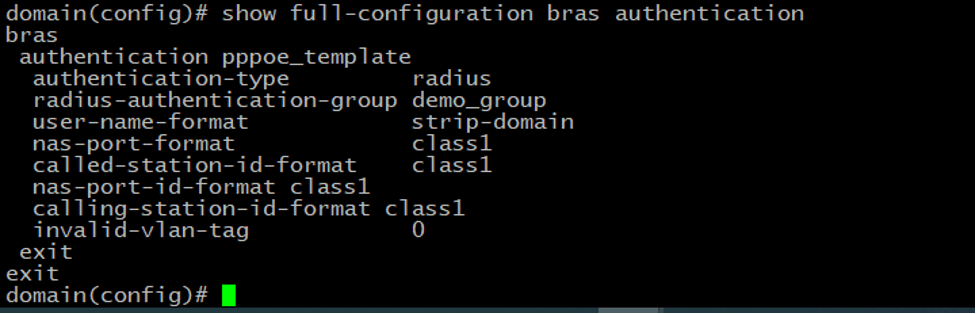
The next step is to create an Authentication template. For Radius authentication, we need to specify the authentication type to use Radius. Here is our configuration.
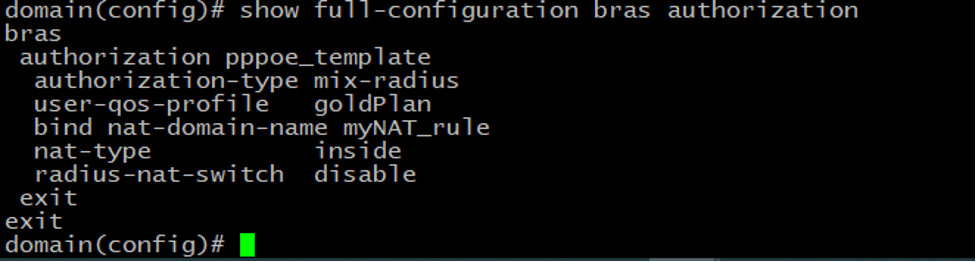
Radius authorization means vBNG will take authorization properties such as user’s IP address, QoS plan, ACL rules, etc. from the attributes carried in the Radius accept reply message instead of using locally configured properties. To achieve this, we need to create an authorization template from which to specify Radius authorization.
Similarly, we create an Accounting template.
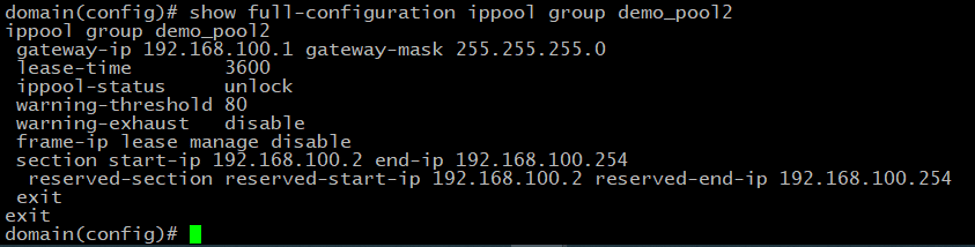
Now we need to configure an IP pool from which PPPoE access subscribers’ IP addresses will be assigned via DHCP. netElastic’s vBNG provides flexible IP pool configurations that can span multiple disjoint segments. In this example, we will configure one IP segment 192.168.100.1/24 with the gateway IP 192.168.100.1 Since we’ll be managing the IP allocation on Splynx itself, we have to reserve the IP range on vBNG, so it honors the IPs assignments obtained via Radius.
The next step is the creation of the VGI interface. Subscribers need to have an access gateway configuration on the vBNG to have network access. netElastic’s vBNG implements the concept of Virtual Gateway Interface (VGI) to configure subscriber’s access gateway. The VGI interface IP address shall match the gateway address in the IP pool configuration as described above.


We have created authentication, authorization & accounting templates, an IP pool, and a VGI interface. Now we need to create a domain to tie all these together and bind the domain to PPPoE access to achieve the desired access behavior. A user access domain defines user access behavior. Multiple domains can be defined for the same access method to define different behaviors. User’s access domains can be switched during operations (through Radius COA or command line) to alter access behaviors.

The same information is displayed in the

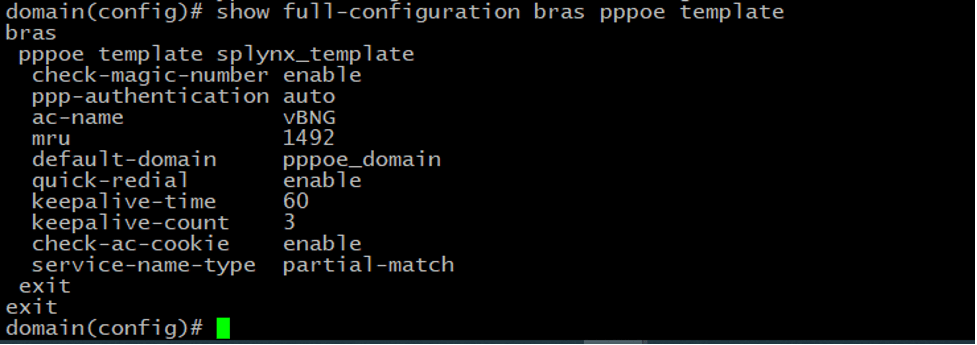
Then, we create a PPPoE template. The parameters ppp-authentication, ac-name, default-domain should be configured according to your own setup.
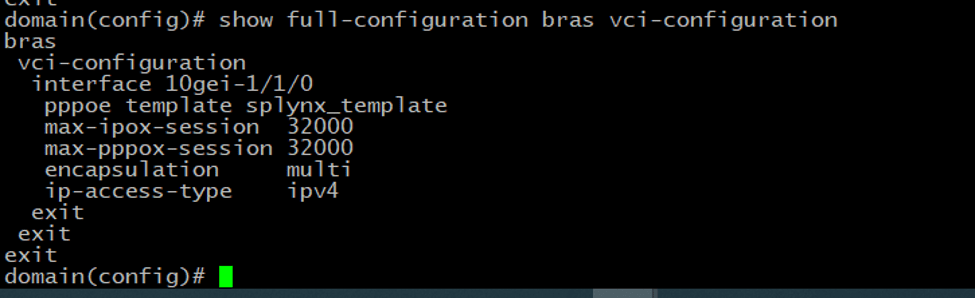
Finally, we need to create a VCI configuration to tie the PPPoE template and the domain to the access interface so the access behavior for traffic coming to the interface will be subject to what we have defined in the PPPoE template and domain template.
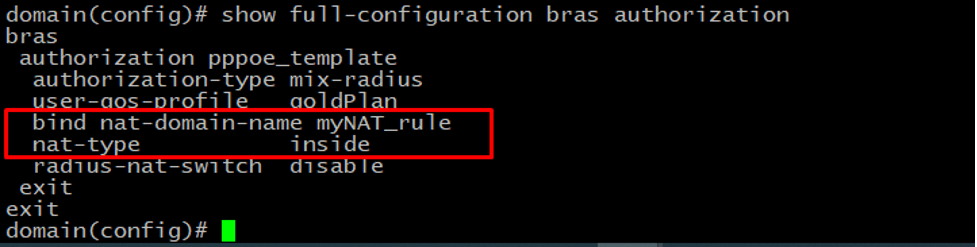
In our test case, to grant users access to the Internet we need to enable NAT on both the network interface (NAT outside) and the access side user gateway (NAT inside).
Here is the sample NAT configuration for our case.
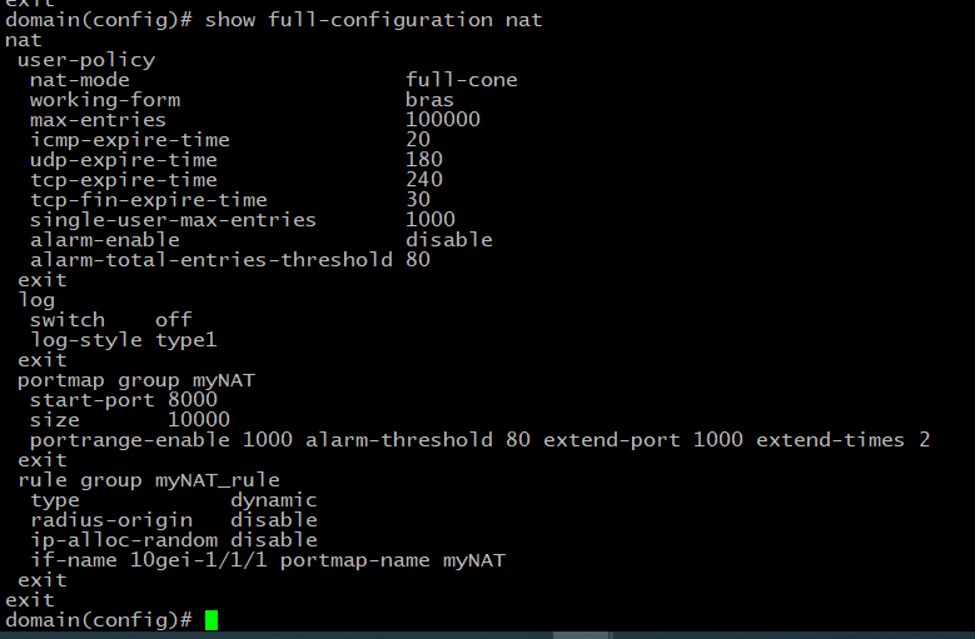
Also, we need to enable NAT in the authorization template.
Congrats! We have just completed the setup on the vBNG side and now it’s time to perform some additional configuration on the Splynx side.
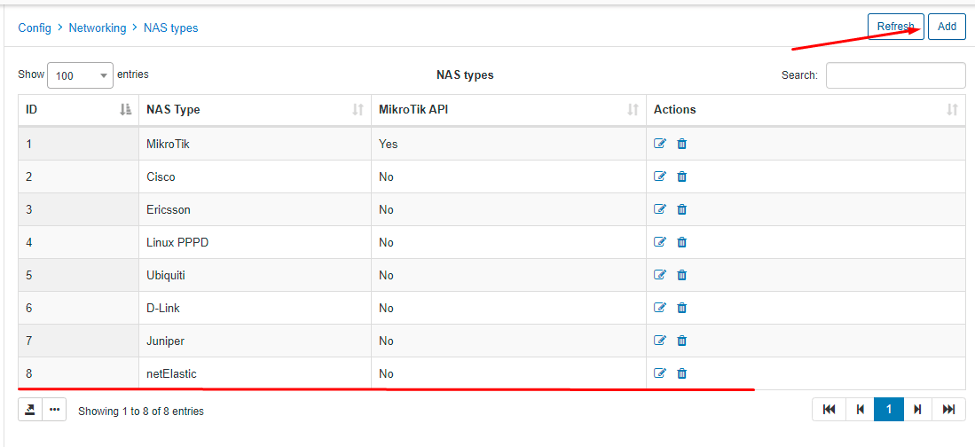
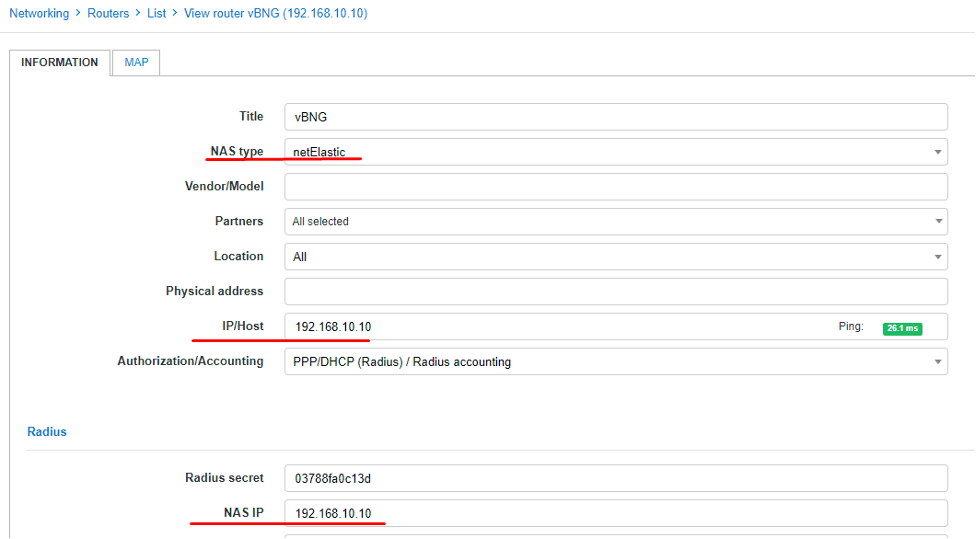
First of all, let’s add our vBNG to Splynx, so they can communicate properly. Go to Config > Networking > NAS types and add a new one.
Go to Networking > Routers > Add and add our vBNG with the configuration according to our diagram.
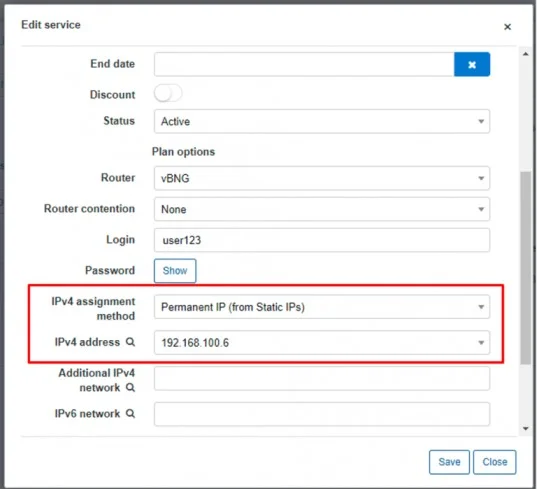
For our test instance, we created a demo user with an assigned Internet tariff plan.

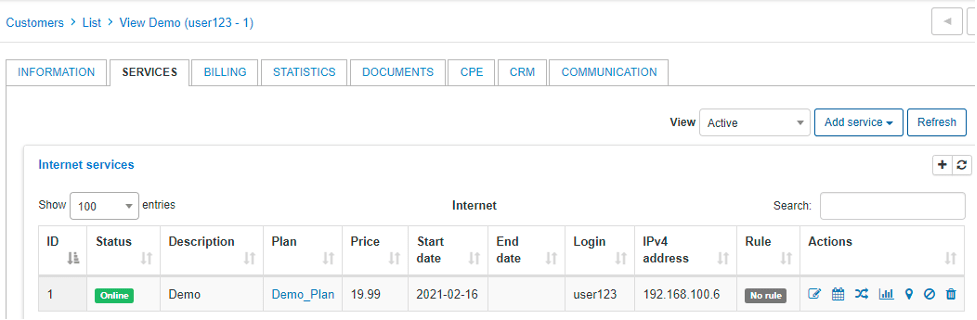
We want him to obtain an IP address from Radius, so assigned a static one for testing purposes.
Let’s say we also want him to have a certain rate limit on the internet service, for instance, 20mbit/10mbit. We’ll show you how to configure it properly on both sides, vBNG and Splynx accordingly.
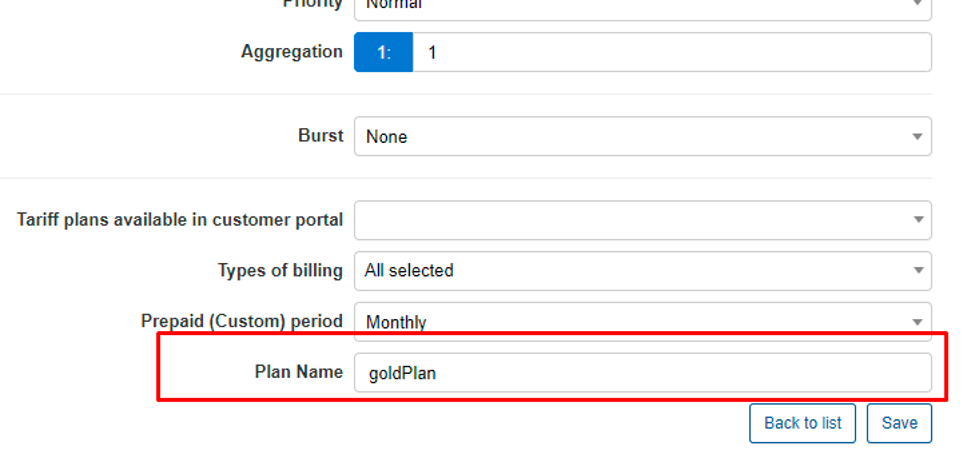
In Splynx we have to edit the internet plan by adding an additional field, which will be sent by Radius to vBNG QoS engine in order to define the policy applied to customers.

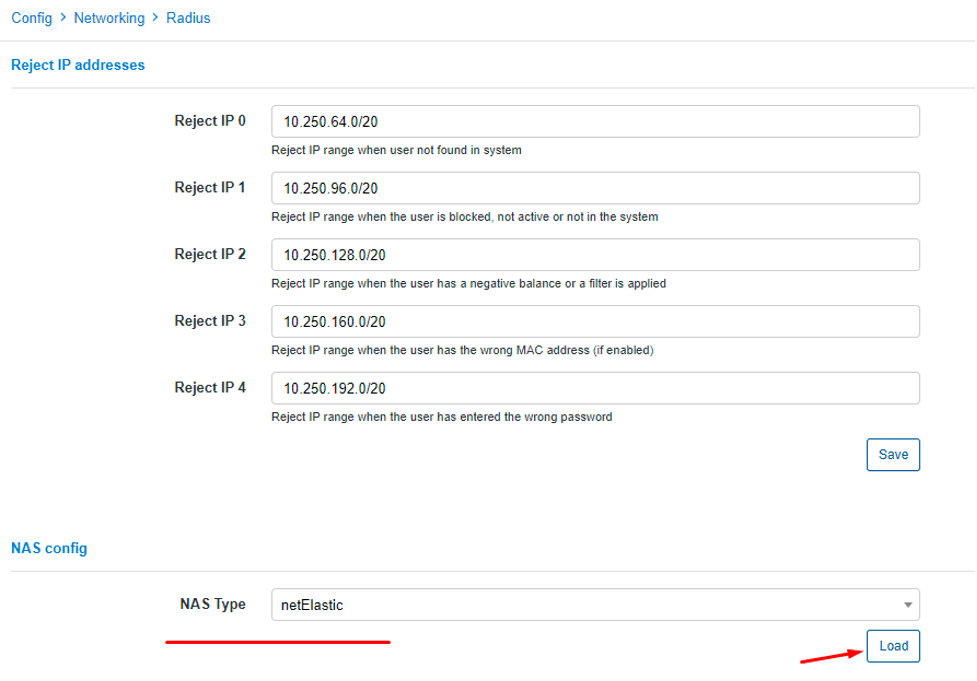
To make this functionality work, let’s create additional tweaks to the Radius configuration. Go to Config > Networking > Radius, under NAS Config section choose netElastic for NAS type from the drop-down menu and click on Load button.
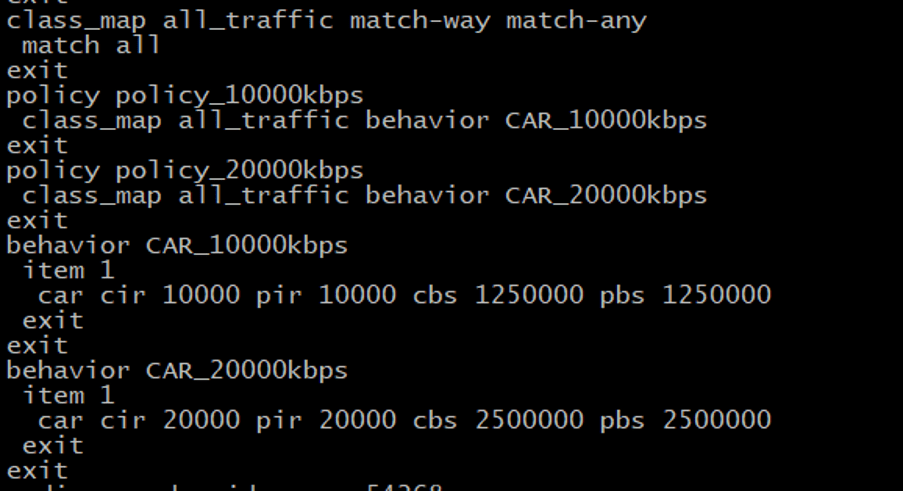
Under netElastic Configuration scroll down to Rate-Limit attributes and enter as follows:

Here, NetElastic-Qos-Profile-Name is the parameter that tells the vBNG’s internal QoS engine which policy to apply, so essentially, we are sending from our Radius NetElastic-Qos-Profile-Name=goldPlan as per the configuration described earlier.
The QoS configuration on the vBNG side involves the following steps:
Here is our configuration for the test instance.
The same configuration referenced in vBNG Manager

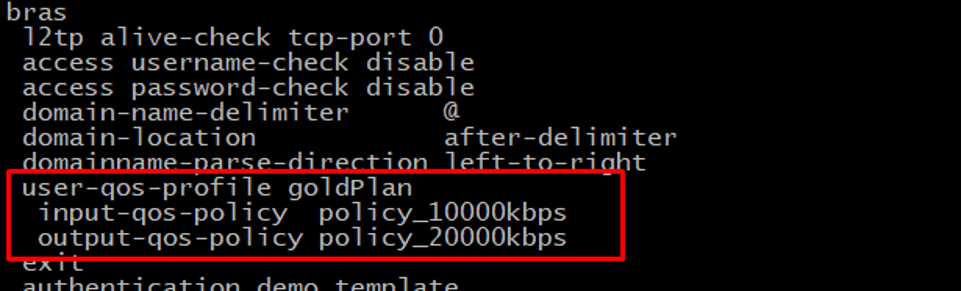
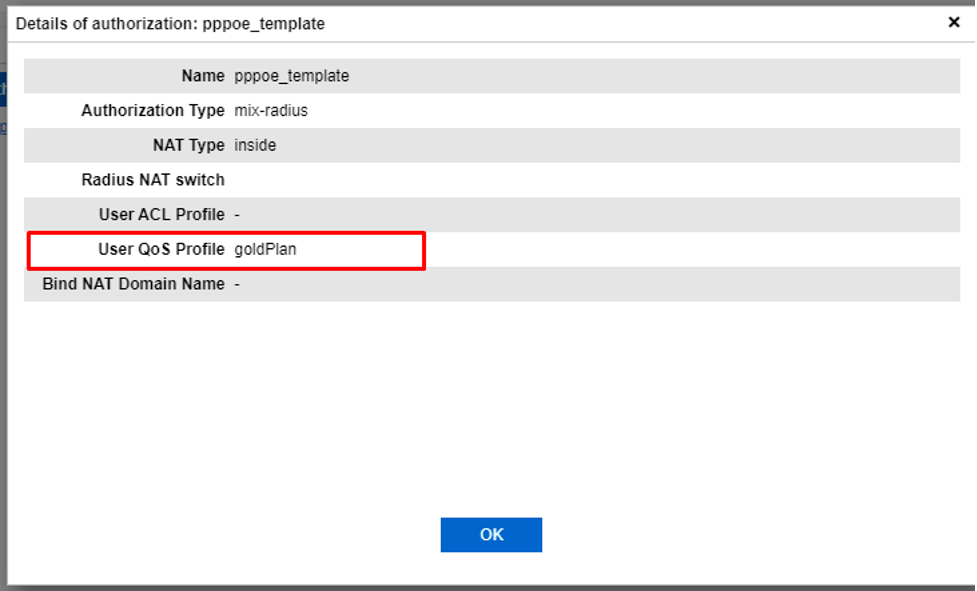
The QoS profile is attached to the authorization template as follows:
That’s about it.
If everything is configured properly, you should be able to see the various accounting information related to our test user in the Splynx dashboard.


Introducing mPSK for simple and robust per-device control of WiFi networks
mPSK support is part of Splynx, so you can easily segment your WiFi Network with Private Pre-Shared-Keys without requiri...
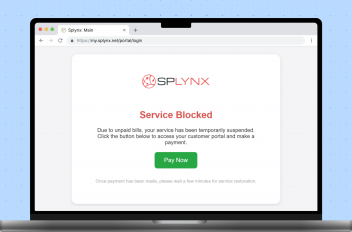
Improve Non-Payment Handling with Splynx DNS Blocking
Tackle non-payments more proficiently by redirecting blocked customers to a landing page. From there, they can easily ac...
Switch to the safe side and let network engineers sleep well at night
Running a local ISP comes with enough challenges — worrying about network failures and blocking non-paying customers d...

Using TR-069 ACS to Deliver High-Quality Wi-Fi to Residential Customers While Cutting Costs
TR-069 ACS isn't a magic pill for all troubles, but it can make your life much easier. This article we'll guide you thro...

Bandwidth isn’t key to QoE. Latency, bufferbloat & jitter matters
Many people misunderstand bandwidth and network speed and think latency doesn't matter over fiber. But that's not how it...
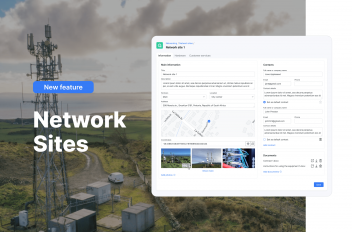
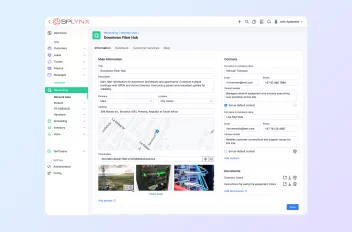
Simplifying Network Management for ISPs with Splynx Network Sites
Splynx Network sites bring ISPs around the world more streamlined client communication and efficient tracking for all yo...
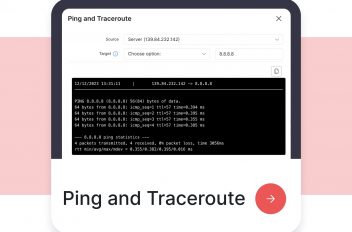
Simplifying network troubleshooting with Ping and Traceroute features
Explore Splynx 4.2's Ping and Traceroute features, simplifying network troubleshooting and boosting ISP team efficiency.
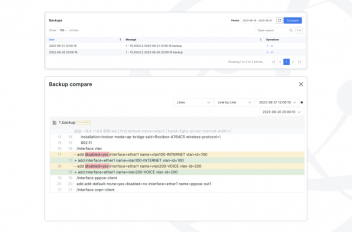
Hardware Backup & Change Management in Splynx
Maintaining network stability and reliability is paramount for both ISPs and their valued customers. To address this, Sp...
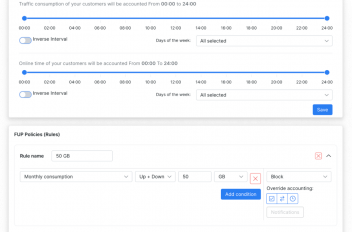
Bandwidth management in Splynx
As a local ISP business owner, ensuring efficient bandwidth management is crucial for maintaining customer satisfaction ...
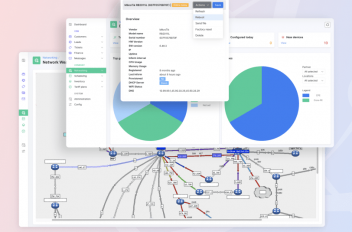
Streamlining network management: A closer look at Splynx’s capabilities
Efficient network management is essential for ISPs to deliver reliable and high-quality services to their customers. Wit...
Find out how Splynx helps ISPs grow
Learn more


