
Share

This blog post describes how to configure the Mikrotik router to act as a PPPoE server with IPv6 enabled.
Check out:
Starting from RouterOS 6.48.2 DHCPv6, Prefix Delegation with Radius server over PPPoE tunnel works correctly (don’t opt for the earlier versions of RouterOS).
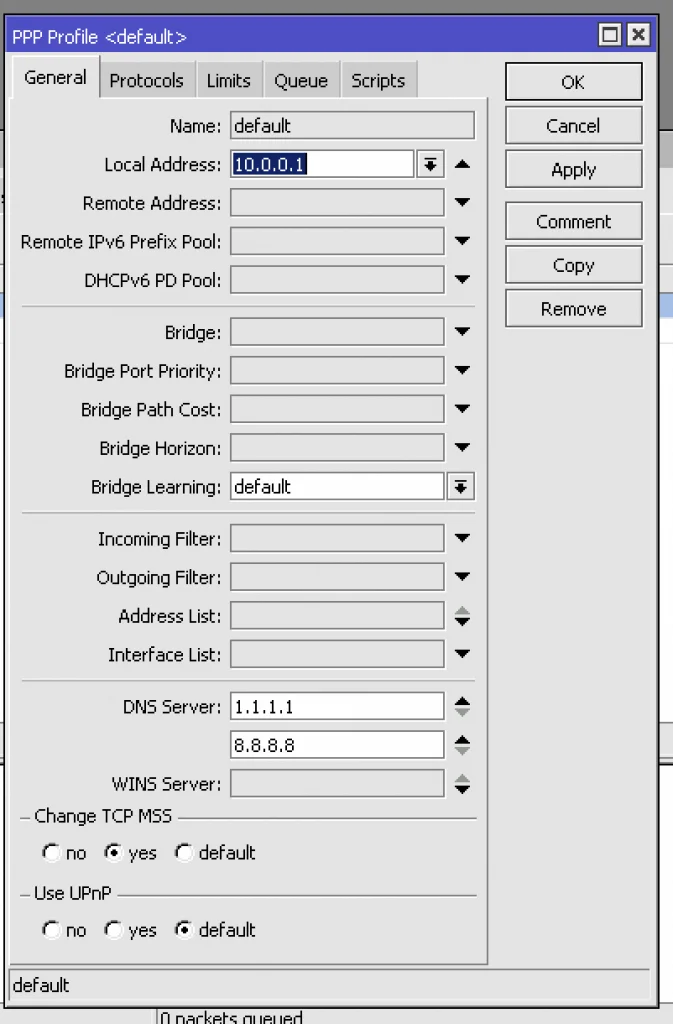
First, you have to create the Mikrotik PPPoE server with Radius authentication. Take a look at the screenshot where the basic PPPoE server settings of RouterOS are depicted. Don’t mind other configurations to make IPv6 work.
Note that you don’t have to specify IPv6 pools since they’re assigned by the Radius server.
Unfortunately, there is no way to assign public IPv6 to the WAN PPPoE interface of the customer via the Radius server. PPPoE works well on the local link addresses even without this feature.
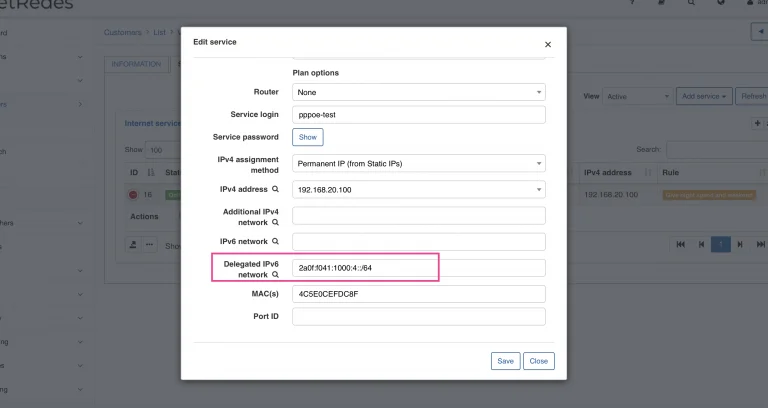
Speaking of Splynx configuration, you should configure the customer internet service with “Delegated IPv6 network”.
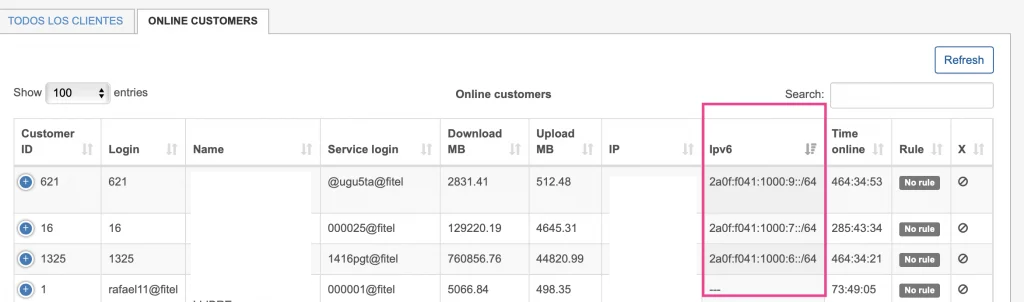
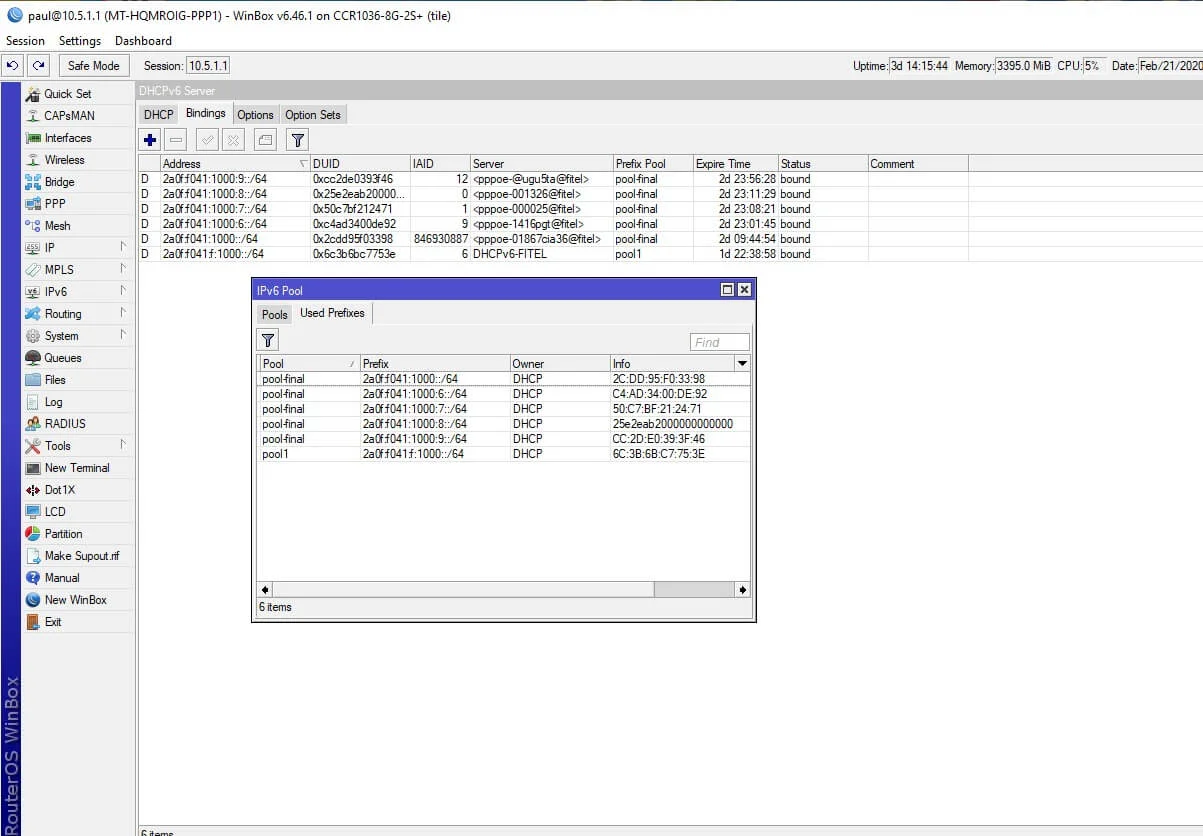
When the PPPoE session is connected and IPv6 assigned, you can find it in the “DHCPv6 Active Leases”. Here’s an example:
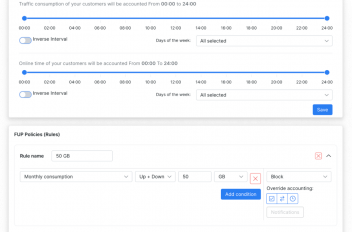
Usually, IPv4 traffic gets blocked when the customer’s IP address is added to the address list and traffic is redirected. Another way is to assign the IP address from a special pool for the blocked subscribers to a customer. You cannot complete this configuration with IPv6 because currently, Radius cannot set the special pool or engage with the IPv6 of the end-user.
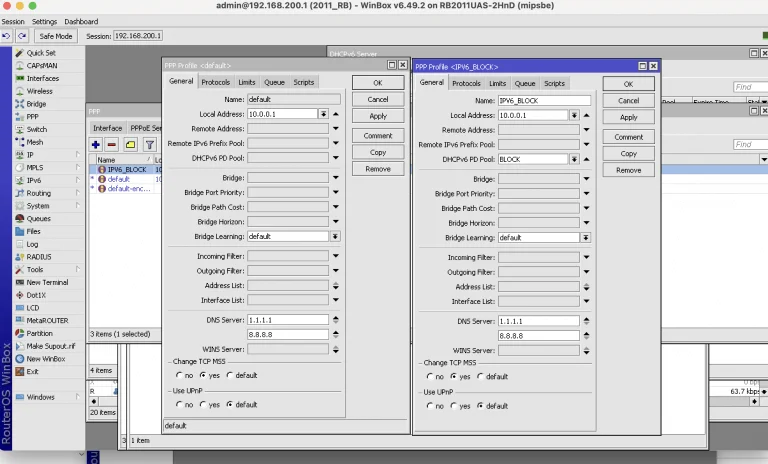
The only possible way is to have several profiles configured in the Mikrotik PPPoE server. Radius’s profile can be sent to the Mikrotik PPPoE router via the Mikrotik-Group attribute. Here is a description of the attribute from the Mikrotik website:
In this case, you need to set two profiles: the default and the block ones. The block profile should have an IPv6 pool for blocking.
The default profile is used for authenticated users, and the block one is assigned to the locked or non-authenticated customers.
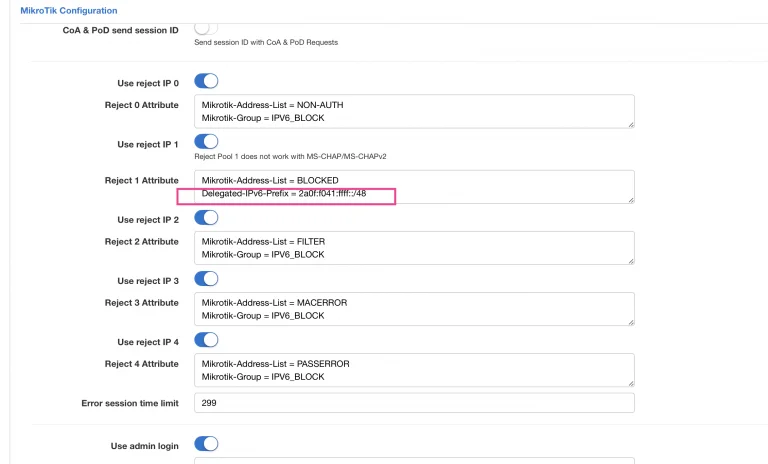
The second way and the easier one is to define statically a pool inside Splynx blocking Radius configuration. This will work both for PPPoE and native DHCPv6 authentication.
For example, Delegated-IPv6-Pool = 2a0f:f041:ffff::/48. Take a look at the screenshot below.

The second option and easier one is to define statically a pool inside Splynx blocking Radius configuration. This will work both for PPPoE and native DHCPv6 authentication. For example Delegated-IPv6-Pool = 2a0f:f041:ffff::/48, please check the screenshot below.
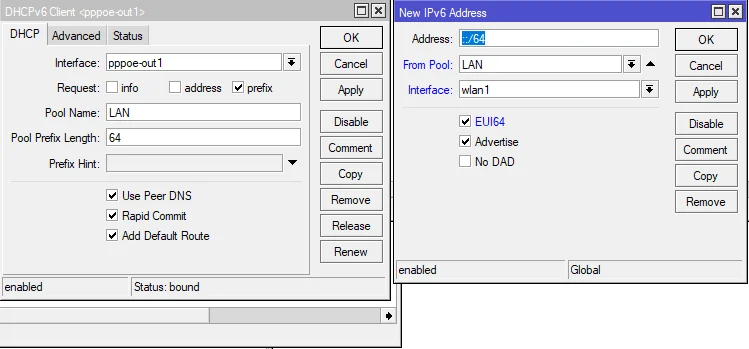
Mikrotik can act as a home router or CPE with IPv6 support enabled. First of all, you need to activate the IPv6 package that is always disabled by default.
For instance, you have a WAN interface with PPPoE-client and Bridge configured for LAN interfaces. After the activation of the PPPoE interface and setting user/password there, you should enable the DHCPv6 client on the PPPoE-client interface. DHCPv6 client should receive the delegated prefix from the PPPoE router (yes, it sounds weird, but there is a DHCP client running over the PPPOE client for IPv6 because originally there was no way to provide a delegated prefix to the home router).
Remember to configure the pool name and create an IP address assignment with SLAAC on the LAN interface. It’ll be easier simply to copy the configuration captured on the screenshot below ↓

Introducing mPSK for simple and robust per-device control of WiFi networks
mPSK support is part of Splynx, so you can easily segment your WiFi Network with Private Pre-Shared-Keys without requiri...
Improve Non-Payment Handling with Splynx DNS Blocking
Tackle non-payments more proficiently by redirecting blocked customers to a landing page. From there, they can easily ac...
Switch to the safe side and let network engineers sleep well at night
Running a local ISP comes with enough challenges — worrying about network failures and blocking non-paying customers d...

Using TR-069 ACS to Deliver High-Quality Wi-Fi to Residential Customers While Cutting Costs
TR-069 ACS isn't a magic pill for all troubles, but it can make your life much easier. This article we'll guide you thro...

Bandwidth isn’t key to QoE. Latency, bufferbloat & jitter matters
Many people misunderstand bandwidth and network speed and think latency doesn't matter over fiber. But that's not how it...
Simplifying Network Management for ISPs with Splynx Network Sites
Splynx Network sites bring ISPs around the world more streamlined client communication and efficient tracking for all yo...
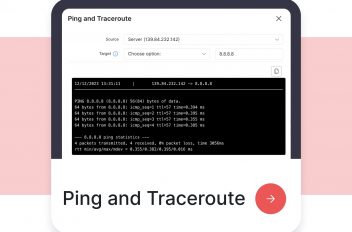
Simplifying network troubleshooting with Ping and Traceroute features
Explore Splynx 4.2's Ping and Traceroute features, simplifying network troubleshooting and boosting ISP team efficiency.
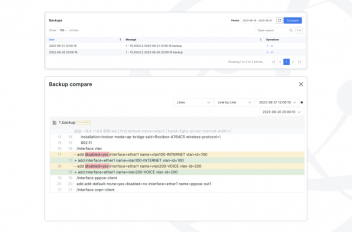
Hardware Backup & Change Management in Splynx
Maintaining network stability and reliability is paramount for both ISPs and their valued customers. To address this, Sp...
Bandwidth management in Splynx
As a local ISP business owner, ensuring efficient bandwidth management is crucial for maintaining customer satisfaction ...
Streamlining network management: A closer look at Splynx’s capabilities
Efficient network management is essential for ISPs to deliver reliable and high-quality services to their customers. Wit...
Find out how Splynx helps ISPs grow
Learn more


