


Sometimes you want to keep a close eye on the changes in Splynx and get notified about them by an email in your inbox. For instance, your administrator changed the service plan, and you need to sign off on those changes.
Though there’s no default tick-and-go setting in Splynx for this purpose, the solution resides in the “Hooks” feature in the Config → Integrations section.
This guide will help you figure out how to configure the “Hooks”.
Basically, the hook is a functionality provided by software for users of that software to have their own code called under certain circumstances. That code can augment or replace the current code.
In Splynx, the hooks can be found in the Config → Integrations section.
For those familiar with programming, it will be pretty easy to configure the hooks.

It’s easier to go over the configuration process with a certain scenario in mind that you can relate to your work operations.
So let’s imagine you want to receive an email in your inbox when the administrator makes some changes to a service plan — you need to monitor the price change for the internet services and get notified when the price is changed.
You’ll need these prerequisites before getting started:
Config → Main → Email.Now let’s get straight into the configuration of the hooks.
First of all, you need to create an executable PHP script somewhere on your Splynx server. The best practice is to have a custom folder under the var/www/splynx/addons folder. Also, make sure that splynx:splynx is the owner of the folder and the script.

Here’s the list of commands:
cd /var/www/splynx/addons
mkdir custom-hooks
chown splynx:splynx custom-hooks/
chown splynx:splynx custom-hooks/
touch notification.php
chown splynx:splynx notification.php
chmod +x notification.php
Create a hook in Splynx. Go to Config → Integrations → Hooks, and click on the “Add” button:
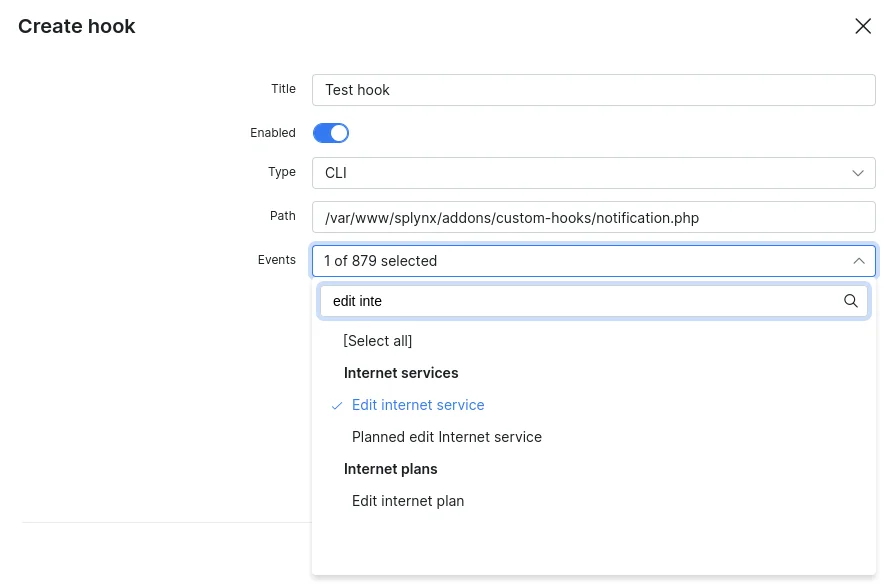
Here you need to create a title, select the “CLI” type, and specify the full path to your script. In the “Events” section, you can choose what event to track. In our case, it’s an “Edit internet service” event.
The next step is to write a short piece of PHP code. Let’s start with general things like getting data from Splynx, converting from JSON, and putting the debug data into the file:
#!/usr/bin/php


defined('STDIN') OR define('STDIN', fopen('php://stdin', 'r'));

$data = fgets(STDIN);

$data = json_decode($data, true);

file_put_contents("/tmp/splynx_hook_debug", print_r($data, TRUE));
Now save this code and test the hook. Let’s change the price for the service #4 from 100 to 200:

You can check if your hook reacted to the event here:

As you can see the hook eventually worked out:
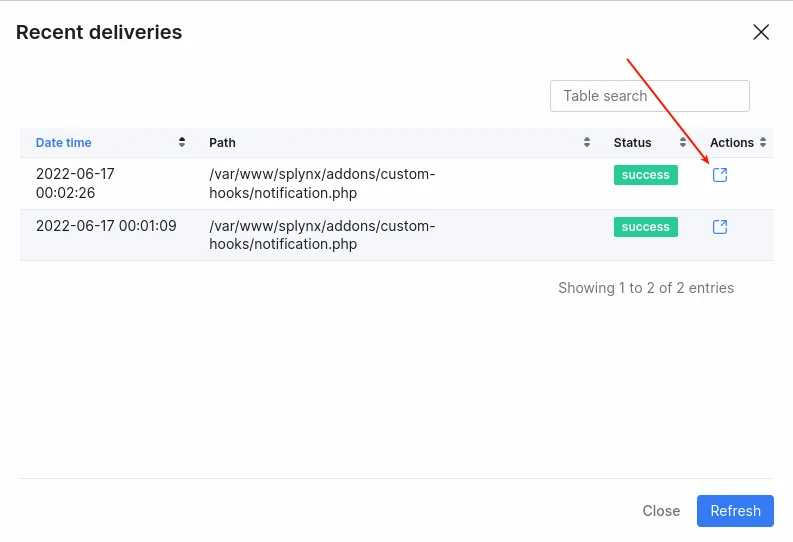
For more details you can click on the “Show details” button:
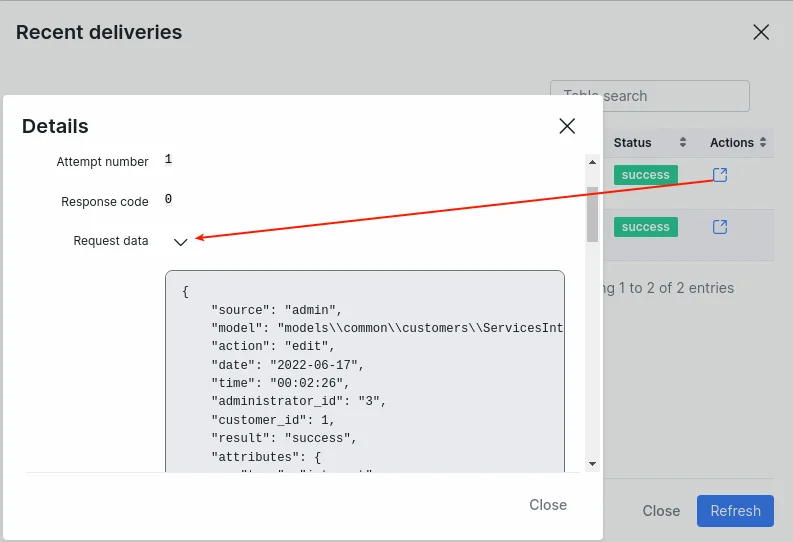
Here you can see all the data that Splynx returns. You need to work with this output. Basically, this line in the code sends the output to the file:
file_put_contents("/tmp/splynx_hook_debug", print_r($data, TRUE));
Here’s what that debug file shows:
Array

(

[source] => admin

[model] => models\common\customers\ServicesInternet

[action] => edit

[date] => 2022-06-17

[time] => 00:09:21

[administrator_id] => 3

[customer_id] => 1

[result] => success

[attributes] => Array

(

[type] => internet

[top_up_tariff_id] =>

[router_id] => 1

[login] => mikee

[password] => mikee

[sector_id] => 0

[taking_ipv4] => 1

[ipv4] => 10.10.10.2

[ipv4_pool_id] => 0

[taking_ipv6] => 0

[ipv6] =>

[ipv6_pool_id] => 0

[mac] => 080027CAD79B

[port_id] =>

[ipv4_route] =>

[ipv6_delegated] =>

[parent_id] => 0

[customer_id] => 1

[tariff_id] => 2

[bundle_service_id] => 0

[description] => 50 Mbps

[quantity] => 1

[unit] =>

[unit_price] => 200

[start_date] => 2021-12-30

[end_date] =>

[discount] => 0

[discount_value] => 0

[discount_type] => percent

[discount_start_date] =>

[discount_end_date] =>

[discount_text] =>

[status] => active

[status_new] =>

[period] => -1

[old_tariff_id] =>

[planned_date] =>

[validate_login] => 1

[id] => 4

[updated_at] => 2022-06-17 00:09:21

)

[attributes_additional] => Array

(

[agent_remote_id] => *

[important] =>

[inv_item] =>

[realm] =>

)

[changed_attributes] => Array

(

[unit_price] => Array

(

[value] => 100.0000

[is_additional] => 0

)

[updated_at] => Array

(

[value] => 2022-06-17 00:09:15

[is_additional] => 0

)

)

[extra] =>

[errors] =>

[ip] => 85.159.5.211

[hook_id] => 5

)
Under the “attributes” element, you can find a new price. Under the “changed_attributes” element, you can see an old price. Now you can add a few more lines to your PHP code:
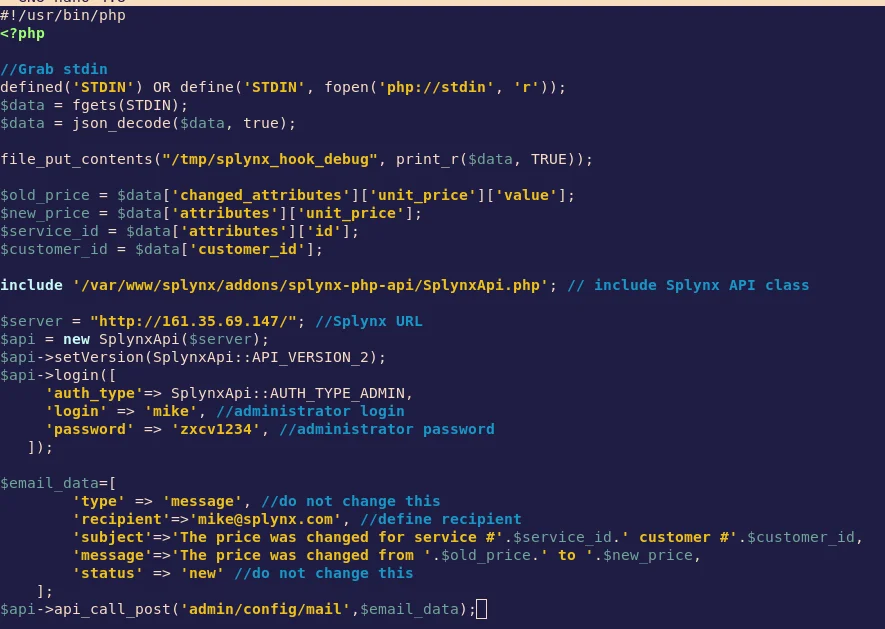
#!/usr/bin/php


$api->login([

'auth_type'=> SplynxApi::AUTH_TYPE_ADMIN,

'login' => 'admin', //administrator login

'password' => 'q1w2e3r4t5', //administrator password

]);
$email_data=[

'type' => 'message', //do not change this

'recipient'=>'mike@splynx.com', //define recipient

'subject'=>'The price was changed for service #'.$service_id.' customer #'.$customer_id,

'message'=>'The price was changed from '.$old_price.' to '.$new_price,

'status' => 'new' //do not change this

];

$api→api_call_post('admin/config/mail',$email_data);
As a result, you receive an email notification about the price change.

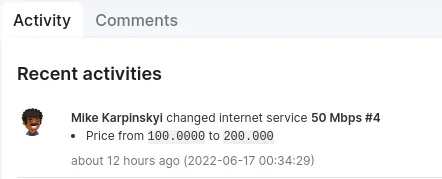
Also, you can check this update under the customer activity:
This was a basic example of how you can use hooks in Splynx. Check out the resources, we’ve used in this article:
Find out how Splynx helps ISPs grow
Learn more