
Share

In this article, you can find helpful commands that can be used for the configuration of Huawei MA5800-X7 GPON from within Splynx. Huawei instead of the “show” use the “display” command. Also, there is enable mode, similar to Cisco devices. If we need to delete part of the configuration – use “undo some_command” instead of “no some_command”.
The basic information of the system display version give the understanding of the version of equipment and OS running on it.
It shows interfaces, for instance, MEth0. Now it’s showing GPON ports:display interface
The most important commands show running and startup configurations:
display saved-configuration

display saved-configuration
Get information about configured IPs and also the routing table:
display ip interfaces

display ip routing-table
Use:
ip route-static 0.0.0.0 0.0.0.0 10.0.0.1
ssh user "test" authentication-type password
Before configuring GPON and VLANs we need to install physical cards to chassis slots and initiate them with commands similar to:
This command is adding a card on board 0, slot 5. And it’s defining that it’s a 16 port GPON card. In our case, we have one H901GPHF (GPON 16 port) and H901MPLA (SFP+ Ethernet) card: board add 0/5 H901GPHF
SET VLANS. ID depends on the design, let’s assume that 100 is management, 200 Internet, 300 voice and 400 is IPTV.
(config)
vlan 100 smart

vlan 200 smart

vlan 300 smart

vlan 400 smart
SET VLANs to the UPLINK PORT.
Our UPLINK port is located in the board 0, slot 0, SFP port 0. It means “0/8 0”
(config)
port vlan 100 0/8 0

port vlan 200 0/8 0

port vlan 300 0/8 0

port vlan 400 0/8 0
Defining DBA profiles. This defines upload speed (capability of the service on one ONT).
Here it says that upload for MGNT is a maximum 1Mbps, for the Internet is from 10Mbps to 200Mbps, Voice is 4Mbps and TV is up to 5 Mbps.
dba-profile add profile-id 100 profile-name "MGNT" type1 fix 1024

dba-profile add profile-id 102 profile-name "INTERNET" type3 assure 10000 max 200000

dba-profile add profile-id 103 profile-name "VOICE" type1 fix 4096

dba-profile add profile-id 104 profile-name "CUSTOM_TV" type1 fix 5192
Configure traffic tables and define real speed limitations.
We define MGNT to 1 Mbps Up and down, Voice to 4 Mbps, TV to 10 Mbps, and the Internet to 100/20 Mbps.
traffic table ip index 100 name "MGNT" cir 512 cbs 329680 pir 1024 pbs 329680 color-mode color-blind priority 7 priority-policy local-setting

traffic table ip index 101 name "INTERNET_100_DOWN" cir 10000 cbs 329680 pir 100000 pbs 329680 priority 0 priority-policy local-Setting

traffic table ip index 102 name "INTERNET_20_UP" cir 4096 cbs 329680 pir 20000 pbs 329680 priority 0 priority-policy local-Setting

traffic table ip index 103 name "VOICE_SMART" cir 2048 cbs 329680 pir 4096 pbs 329680 color-mode color-blind priority 7 priority-policy local-setting

traffic table ip index 104 name "CUSTOM_TV_COOL" cir 5192 cbs 329680 pir 10240 pbs 329680 color-mode color-blind priority 7 priority-policy local-setting
SYNC PROFILES/BUNDLE.
(config)
ont-lineprofile gpon profile-id 20 profile-name "FTTH-100"
Here we defined ont-lineprofile for FTTH-100 tariff bundle, that includes voice, IPTV, internet and management.
Following configuration lines are put under ont-lineprofile config:
tcont 1 dba-profile-id 100

tcont 2 dba-profile-id 102

tcont 3 dba-profile-id 103

tcont 4 dba-profile-id 104
gem add 1 eth tcont 1

gem add 2 eth tcont 2

gem add 3 eth tcont 3

gem add 4 eth tcont 4
gem mapping 1 1 vlan 100

gem mapping 2 2 vlan 200

gem mapping 3 3 vlan 300

gem mapping 4 4 vlan 400

commit
SERVICE PROFILE.
ont-srvprofile gpon profile-id 20 profile-name "FTTH-100"

ont-port pots adaptive eth adaptive

commit
ONT CONNECTION.
Auto find can be enabled this way:
interface gpon 0/5

port 0 ont-auto-find enable
SET PROFILES to CUSTOMER :
interface gpon 0/5

ont add 0 1 sn-auth "4857544352E92103" omci ont-lineprofile-id 20 ont-srvprofile-id 20 desc "CUSTOMER-1"
The last is the most difficult command – it’s defining service ports for each VLAN for ONT.
service-port 1001 vlan 100 gpon 0/5/0 ont 1 gemport 1 multi-service user-vlan 100 tag-transform translate inbound traffic-table index 10 outbound traffic-table index 10

service-port 1002 vlan 200 gpon 0/5/0 ont 1 gemport 2 multi-service user-vlan 200 tag-transform translate inbound traffic-table index 102 outbound traffic-table index 101

service-port 1003 vlan 300 gpon 0/5/0 ont 1 gemport 3 multi-service user-vlan 300 tag-transform translate inbound traffic-table index 103 outbound traffic-table index 103

service-port 1004 vlan 400 gpon 0/5/0 ont 1 gemport 4 multi-service user-vlan 400 tag-transform translate inbound traffic-table index 104 outbound traffic-table index 104
When everything is configured, there are a few helpful commands for displaying status.
display ont info 0 5 0 all
display ont info summary 0/5
display service-port all
display ont autofind all
display board 0
display board 0/SlotID

display board 0/5
display display current-configuration
display dba-profile all
display traffic table ip from-index 0
display service-port all
display ont-lineprofile gpon all
display ont-srvprofile gpon all
The first step is to delete all associated service ports:
undo service-port 1001

undo service-port 2001

undo service-port 3001

undo service-port 4001
The second step is to delete ONT itself:
interface gpon 0/5

ont delete 0 0

Introducing mPSK for simple and robust per-device control of WiFi networks
mPSK support is part of Splynx, so you can easily segment your WiFi Network with Private Pre-Shared-Keys without requiri...
Improve Non-Payment Handling with Splynx DNS Blocking
Tackle non-payments more proficiently by redirecting blocked customers to a landing page. From there, they can easily ac...
Switch to the safe side and let network engineers sleep well at night
Running a local ISP comes with enough challenges — worrying about network failures and blocking non-paying customers d...

Using TR-069 ACS to Deliver High-Quality Wi-Fi to Residential Customers While Cutting Costs
TR-069 ACS isn't a magic pill for all troubles, but it can make your life much easier. This article we'll guide you thro...

Bandwidth isn’t key to QoE. Latency, bufferbloat & jitter matters
Many people misunderstand bandwidth and network speed and think latency doesn't matter over fiber. But that's not how it...
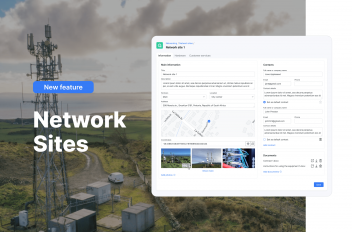
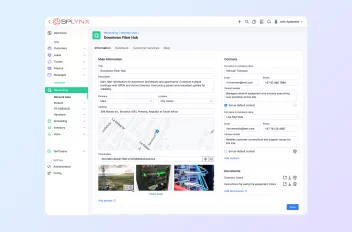
Simplifying Network Management for ISPs with Splynx Network Sites
Splynx Network sites bring ISPs around the world more streamlined client communication and efficient tracking for all yo...
Simplifying network troubleshooting with Ping and Traceroute features
Explore Splynx 4.2's Ping and Traceroute features, simplifying network troubleshooting and boosting ISP team efficiency.
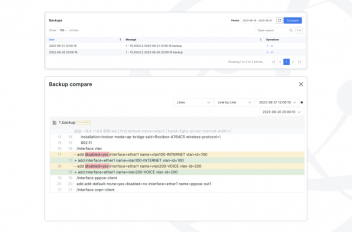
Hardware Backup & Change Management in Splynx
Maintaining network stability and reliability is paramount for both ISPs and their valued customers. To address this, Sp...
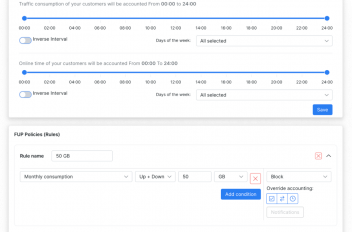
Bandwidth management in Splynx
As a local ISP business owner, ensuring efficient bandwidth management is crucial for maintaining customer satisfaction ...
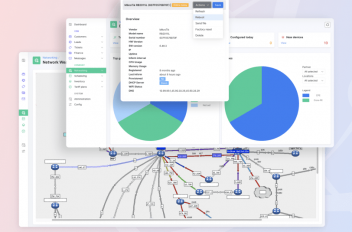
Streamlining network management: A closer look at Splynx’s capabilities
Efficient network management is essential for ISPs to deliver reliable and high-quality services to their customers. Wit...
Find out how Splynx helps ISPs grow
Learn more


