


Step 1: Enabling TR-069 (ACS)
To activate ACS in Splynx, go to Config → Integrations → Main modules and enable the toggle for TR-069 (ACS) under the Networking section.

Step 2: Configuring the ACS Server
Proceed to Config → Networking → TR-069 (ACS) and click on “Install ACS server” to begin the configuration process.

Once the server installation is complete, you’ll need to specify its global parameters. The following options are available:

For optimal performance, it is highly recommended to establish direct visibility between the ACS and end-user devices. They should reside within the same network. Alternatively, you can create a tunnel from your main router to the Splynx server, ensuring reachability from Splynx to every CPE. This setup is crucial as it allows immediate propagation of changes initiated in Splynx, eliminating the need to wait for the default 300-second interval. By achieving this direct connection, you significantly enhance the efficiency and speed of general operations, including ping and traceroute functionalities.
Click the “Save” button once you have completed the configuration.
Step 3: Configuring ACS User Interface (UI) Parameters
In the same menu, Config → Networking → TR-069 (ACS), you can configure the ACS User Interface (UI) parameters:
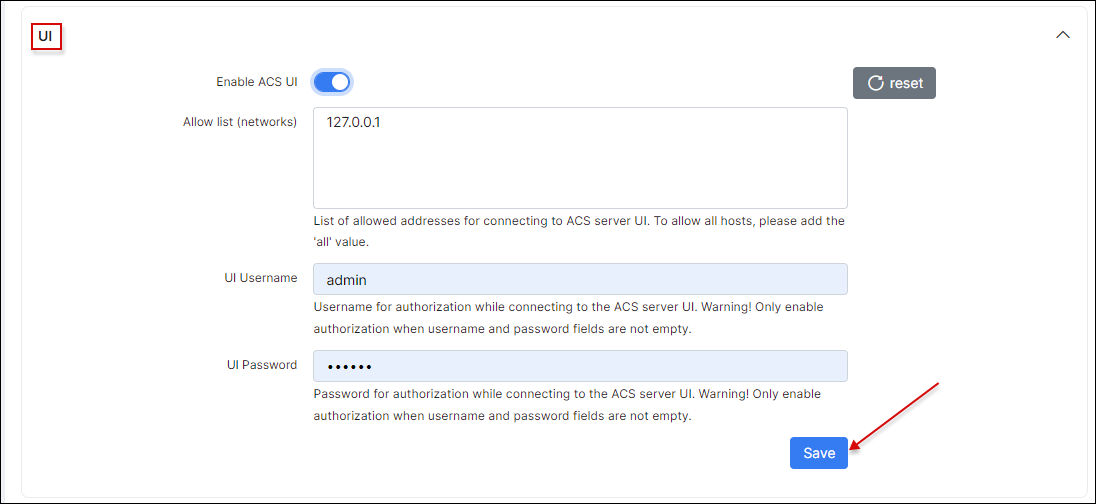
Click the “Save” button once the configuration is complete.
Click the provided link for the UI, which will redirect you to the GenieACS page. If prompted for login credentials, use the username and password set in Step 3.
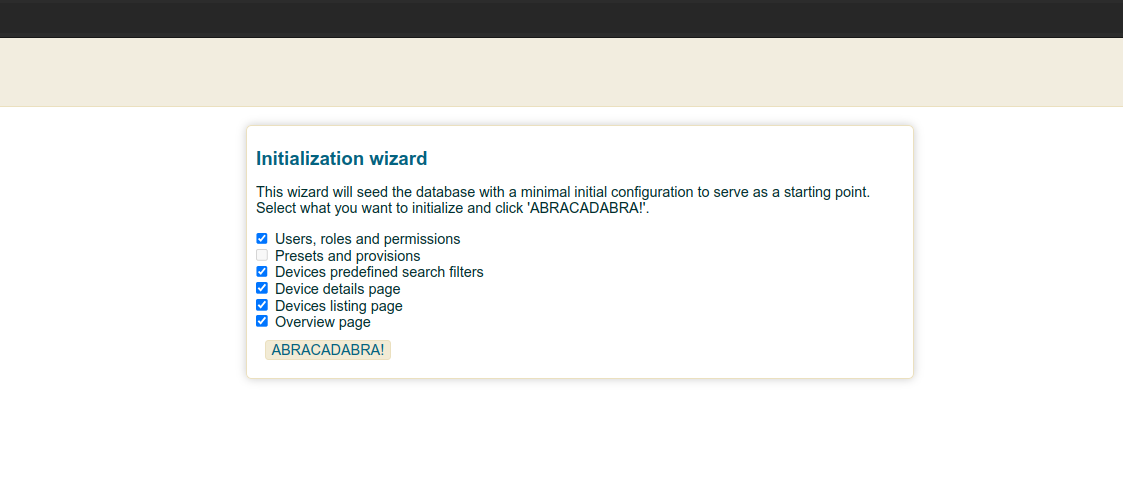
* Important: After successful login, please select all checkboxes except Presets and Provisions and press the ABRACADABRA button.
To illustrate the process, we will use a MikroTik CPE with a TR-069 client.
Step 1: Installing the TR-069 Package
If the TR-069 package is not already installed on your MikroTik device, follow these steps:
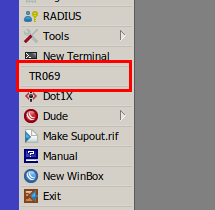
After the reboot, you should find a TR-069 option in the menu.
Step 2: Configuring Connection to the ACS Server
Now, let’s configure the connection to the ACS server by following these steps:

That’s it. The credentials in Connection Request Username and Connection Request Password fields should appear automatically. Do not change these credentials unless absolutely necessary
After completing these steps, the device will become visible under Splynx (Networking > TR-069 (ACS) > Devices).
Before configuring ACS groups, ensure that at least one device is connected to the ACS server by following the steps in the wizard located at Networking → Routers → Add (TR-069 configuration should be completed on the router).
Groups in ACS allow you to create organized entries to group devices based on specific criteria. Follow these steps to create a new group entry:

* Note: It is important to note that keeping the “Auto provisioning” option disabled is recommended. Enabling this feature may result in the automatic upload of an incomplete configuration to your device, potentially leading to the loss of the current device configuration and remote unavailability.
Efficient Device Management
Groups help you efficiently manage and organize devices based on specific criteria such as product type, location, or any other relevant categorization.
Bulk Operations and Configurations
By grouping devices together, you can perform bulk operations or apply specific configurations to multiple devices simultaneously, ensuring that the appropriate settings or firmware updates are applied to each group as needed, saving time and effort.
Groups are used for device provisioning to ensure accurate TR069 attribute assignment for device parameters and properties.
Once a device is added, you have the option to create a group based on that device, extract its configuration parameters, make any necessary modifications, and save them accordingly.
IMPORTANT: When the correct configuration is grabbed from the device, it’s recommended to remove unnecessary attributes and leave only those attributes that you plan add/update etc. on other devices.
After that, these attributes can be used for the configuration of other devices based on this group, using previously exported parameters.
Click on the ‘Provision flow’ icon and choose the necessary option:


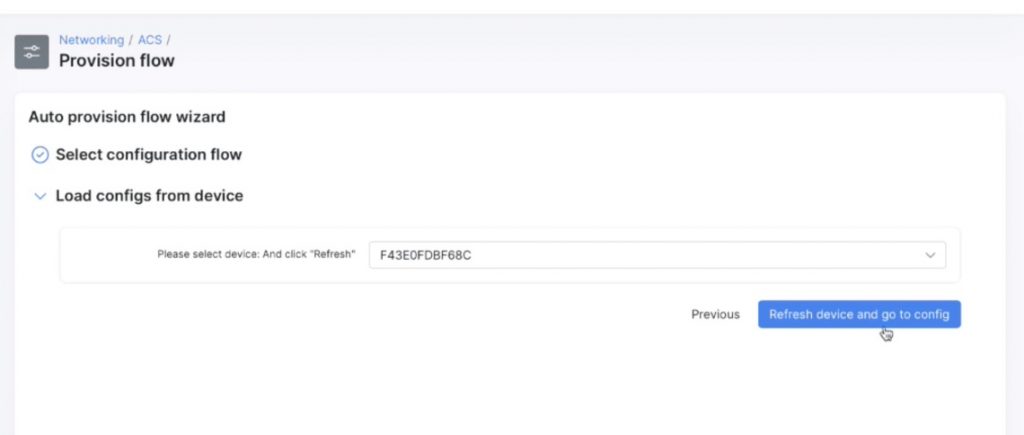
Direct IP visibility is important in this case as it will bring all available parameters that TR-069 provides us.
Splynx has some predefined templates that you can immediately use and update all values. If you choose I want to insert the config manually step, the configuration for the device can be created from scratch in Splynx. You will see a window with the editor of device objects with their attributes. In this configuration menu you can create new objects and attributes related to the object, update, and delete:
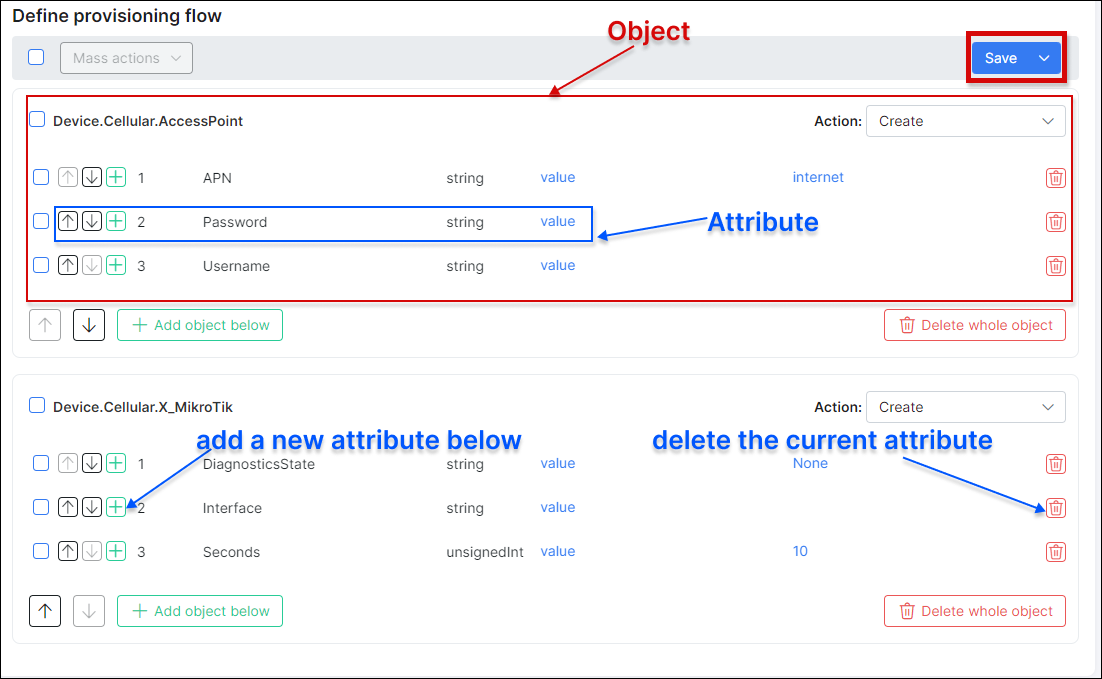
Or apply the mass actions (enable, disable, delete) the existing object and its attribute (-s).
In our demonstration, we established three interfaces to showcase the general workflow.
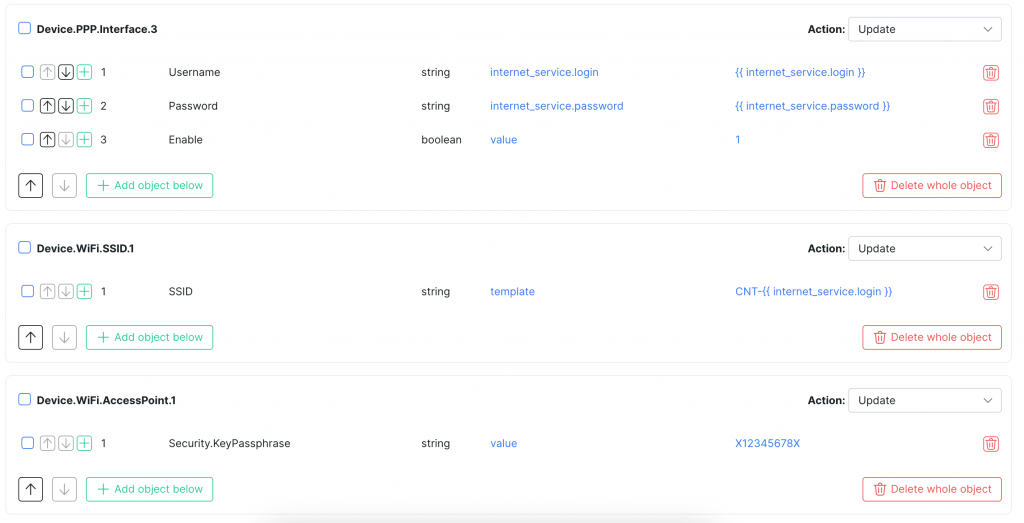
However, you have the flexibility to tailor your provisioning flow according to your unique variables and attributes. To gain a deeper understanding of attributes, we recommend referring to our comprehensive documentation guide.
As soon as the provisioning flow has been configured, you can go to the corresponding device management page and press the button “Run provisioning” in the Actions section.

After that, check if the settings on the device have changed.
TR-069 enables service providers to remotely upgrade CPE firmware, eliminating the need for customer involvement or additional engineers. To illustrate the process, we will upgrade the RouterOS on the MikroTik devices.
Step 1: Uploading Upgrade Files

It is recommended to use HTTPS for firmware management in production
Create an XML file containing the following content:
To simplify the process of making configuration changes in bulk, configuration files can be utilized. In this guide, we will demonstrate how to create two VLANs and one PPPoE interface on the MikroTik router using this method.
To begin, we’ll start by creating a Vendor Configuration File. This file can be employed to perform a complete configuration overwrite, as specified by the standard, or to make configuration alterations by using a file with a “.alter” file extension.

Let’s take a look at an example where we create two VLANs and one PPPoE client without a username or password. Once the configuration file is ready, it needs to be uploaded to the ACS server. You can find the upload option under Networking > (TR-069 ACS) > Files.
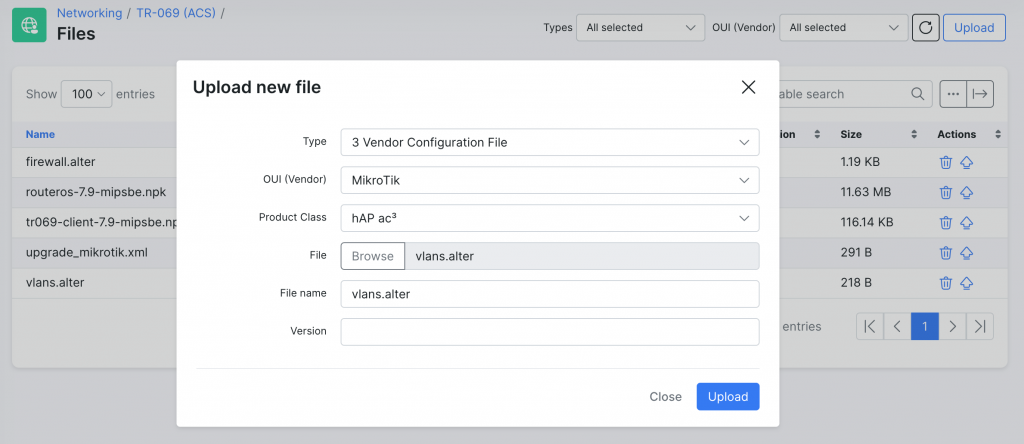
After successfully uploading the configuration file to the ACS server, you can proceed to apply the changes to the desired devices. To do this, navigate to Networking → TR-069 (ACS) → Devices and select the desired devices. From the mass Actions drop-down list, choose the Upgrade action.
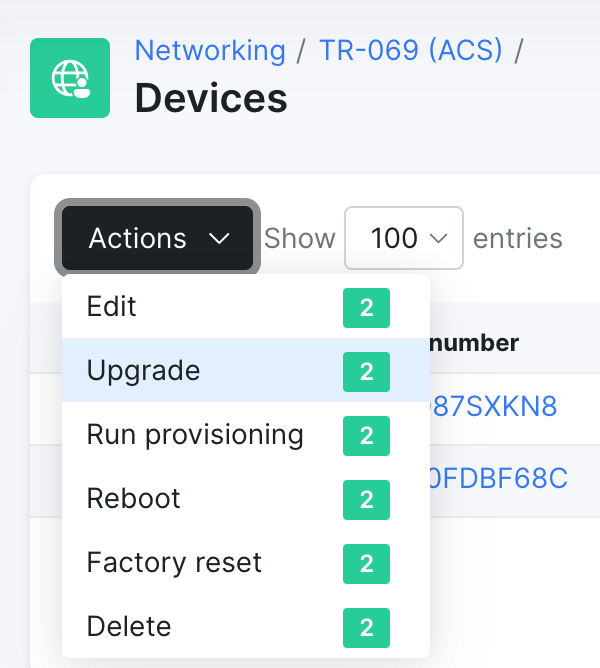
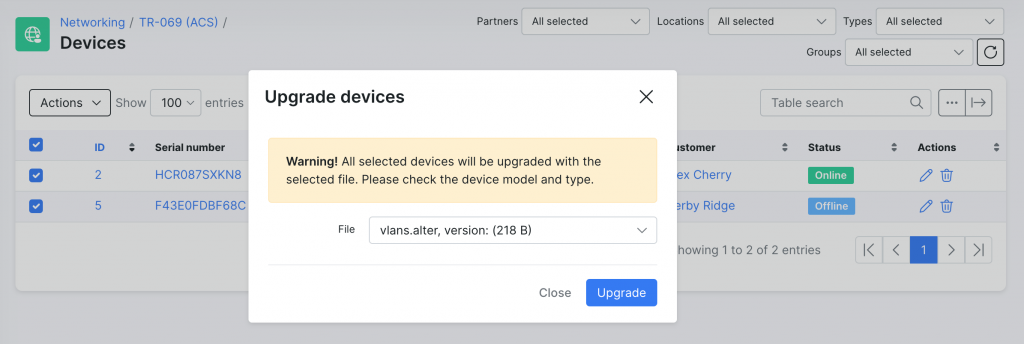
This will allow you to upload the selected configuration files to the respective devices. This action can also be performed for each device separately by selecting the option Send File in the device’s Actions section.
