Splynx installation guide

Step 1: Applying for a trial license

Begin by filling out the application form to obtain a Splynx trial license. This license provides full access to all Splynx features and public modules and allows adding up to 100 customers.

Step 2: Installation link and setup

After completing the form, you will receive a confirmation email containing a link to install your Splynx instance. Click it to proceed with the installation.
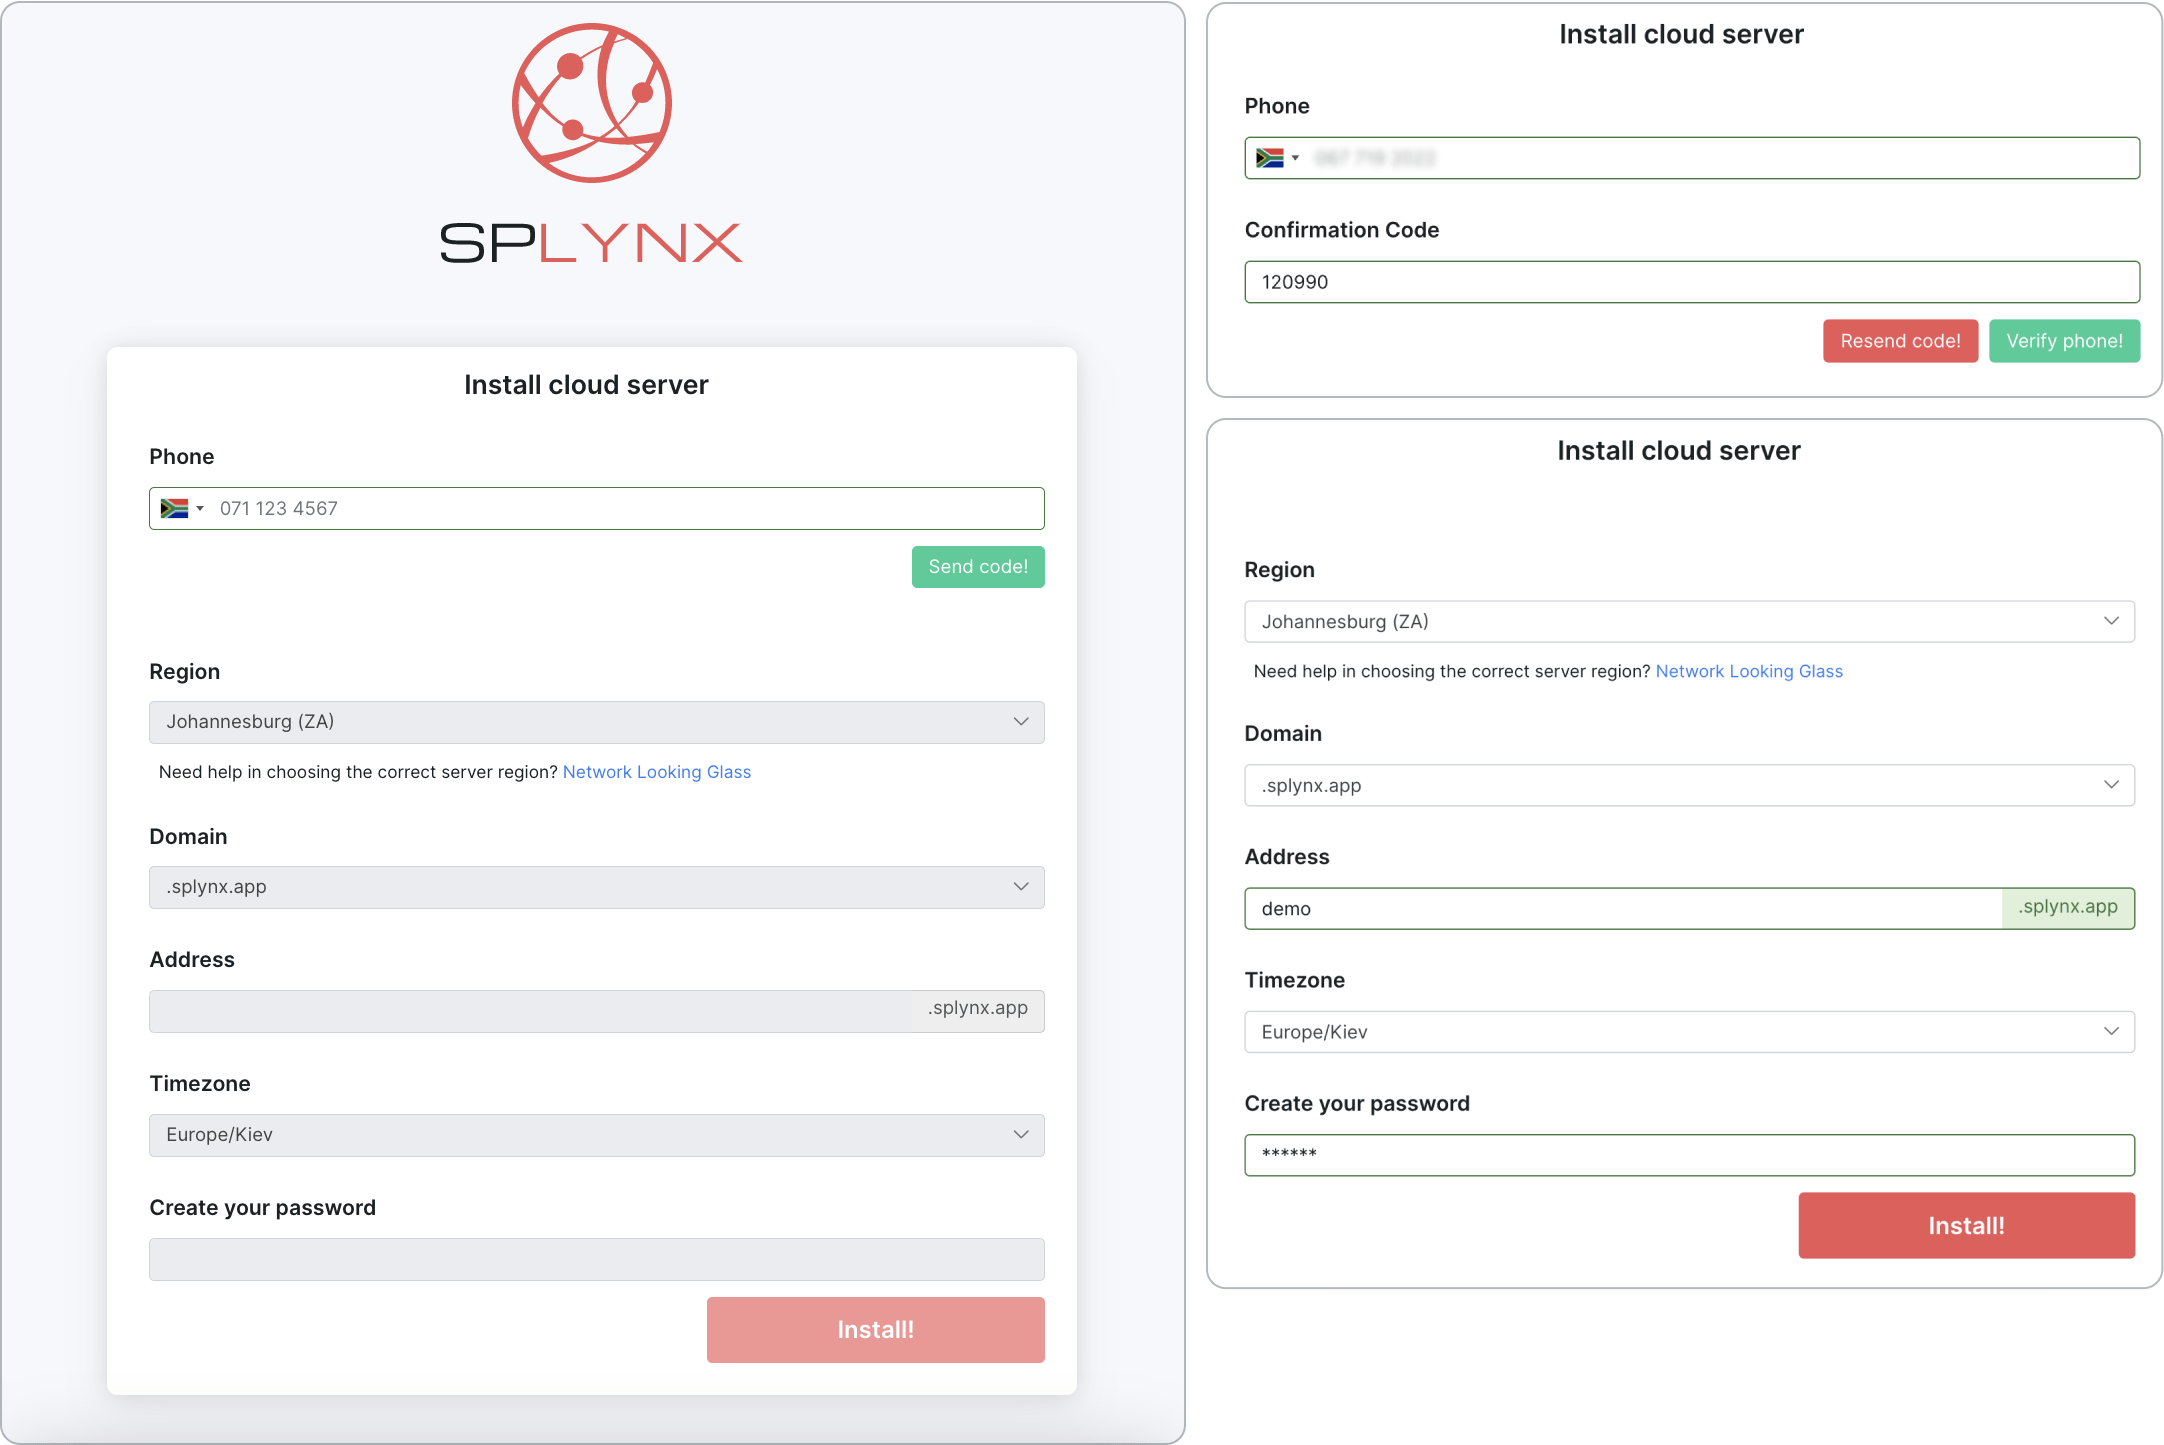
Welcome email installation button

Screenshot example

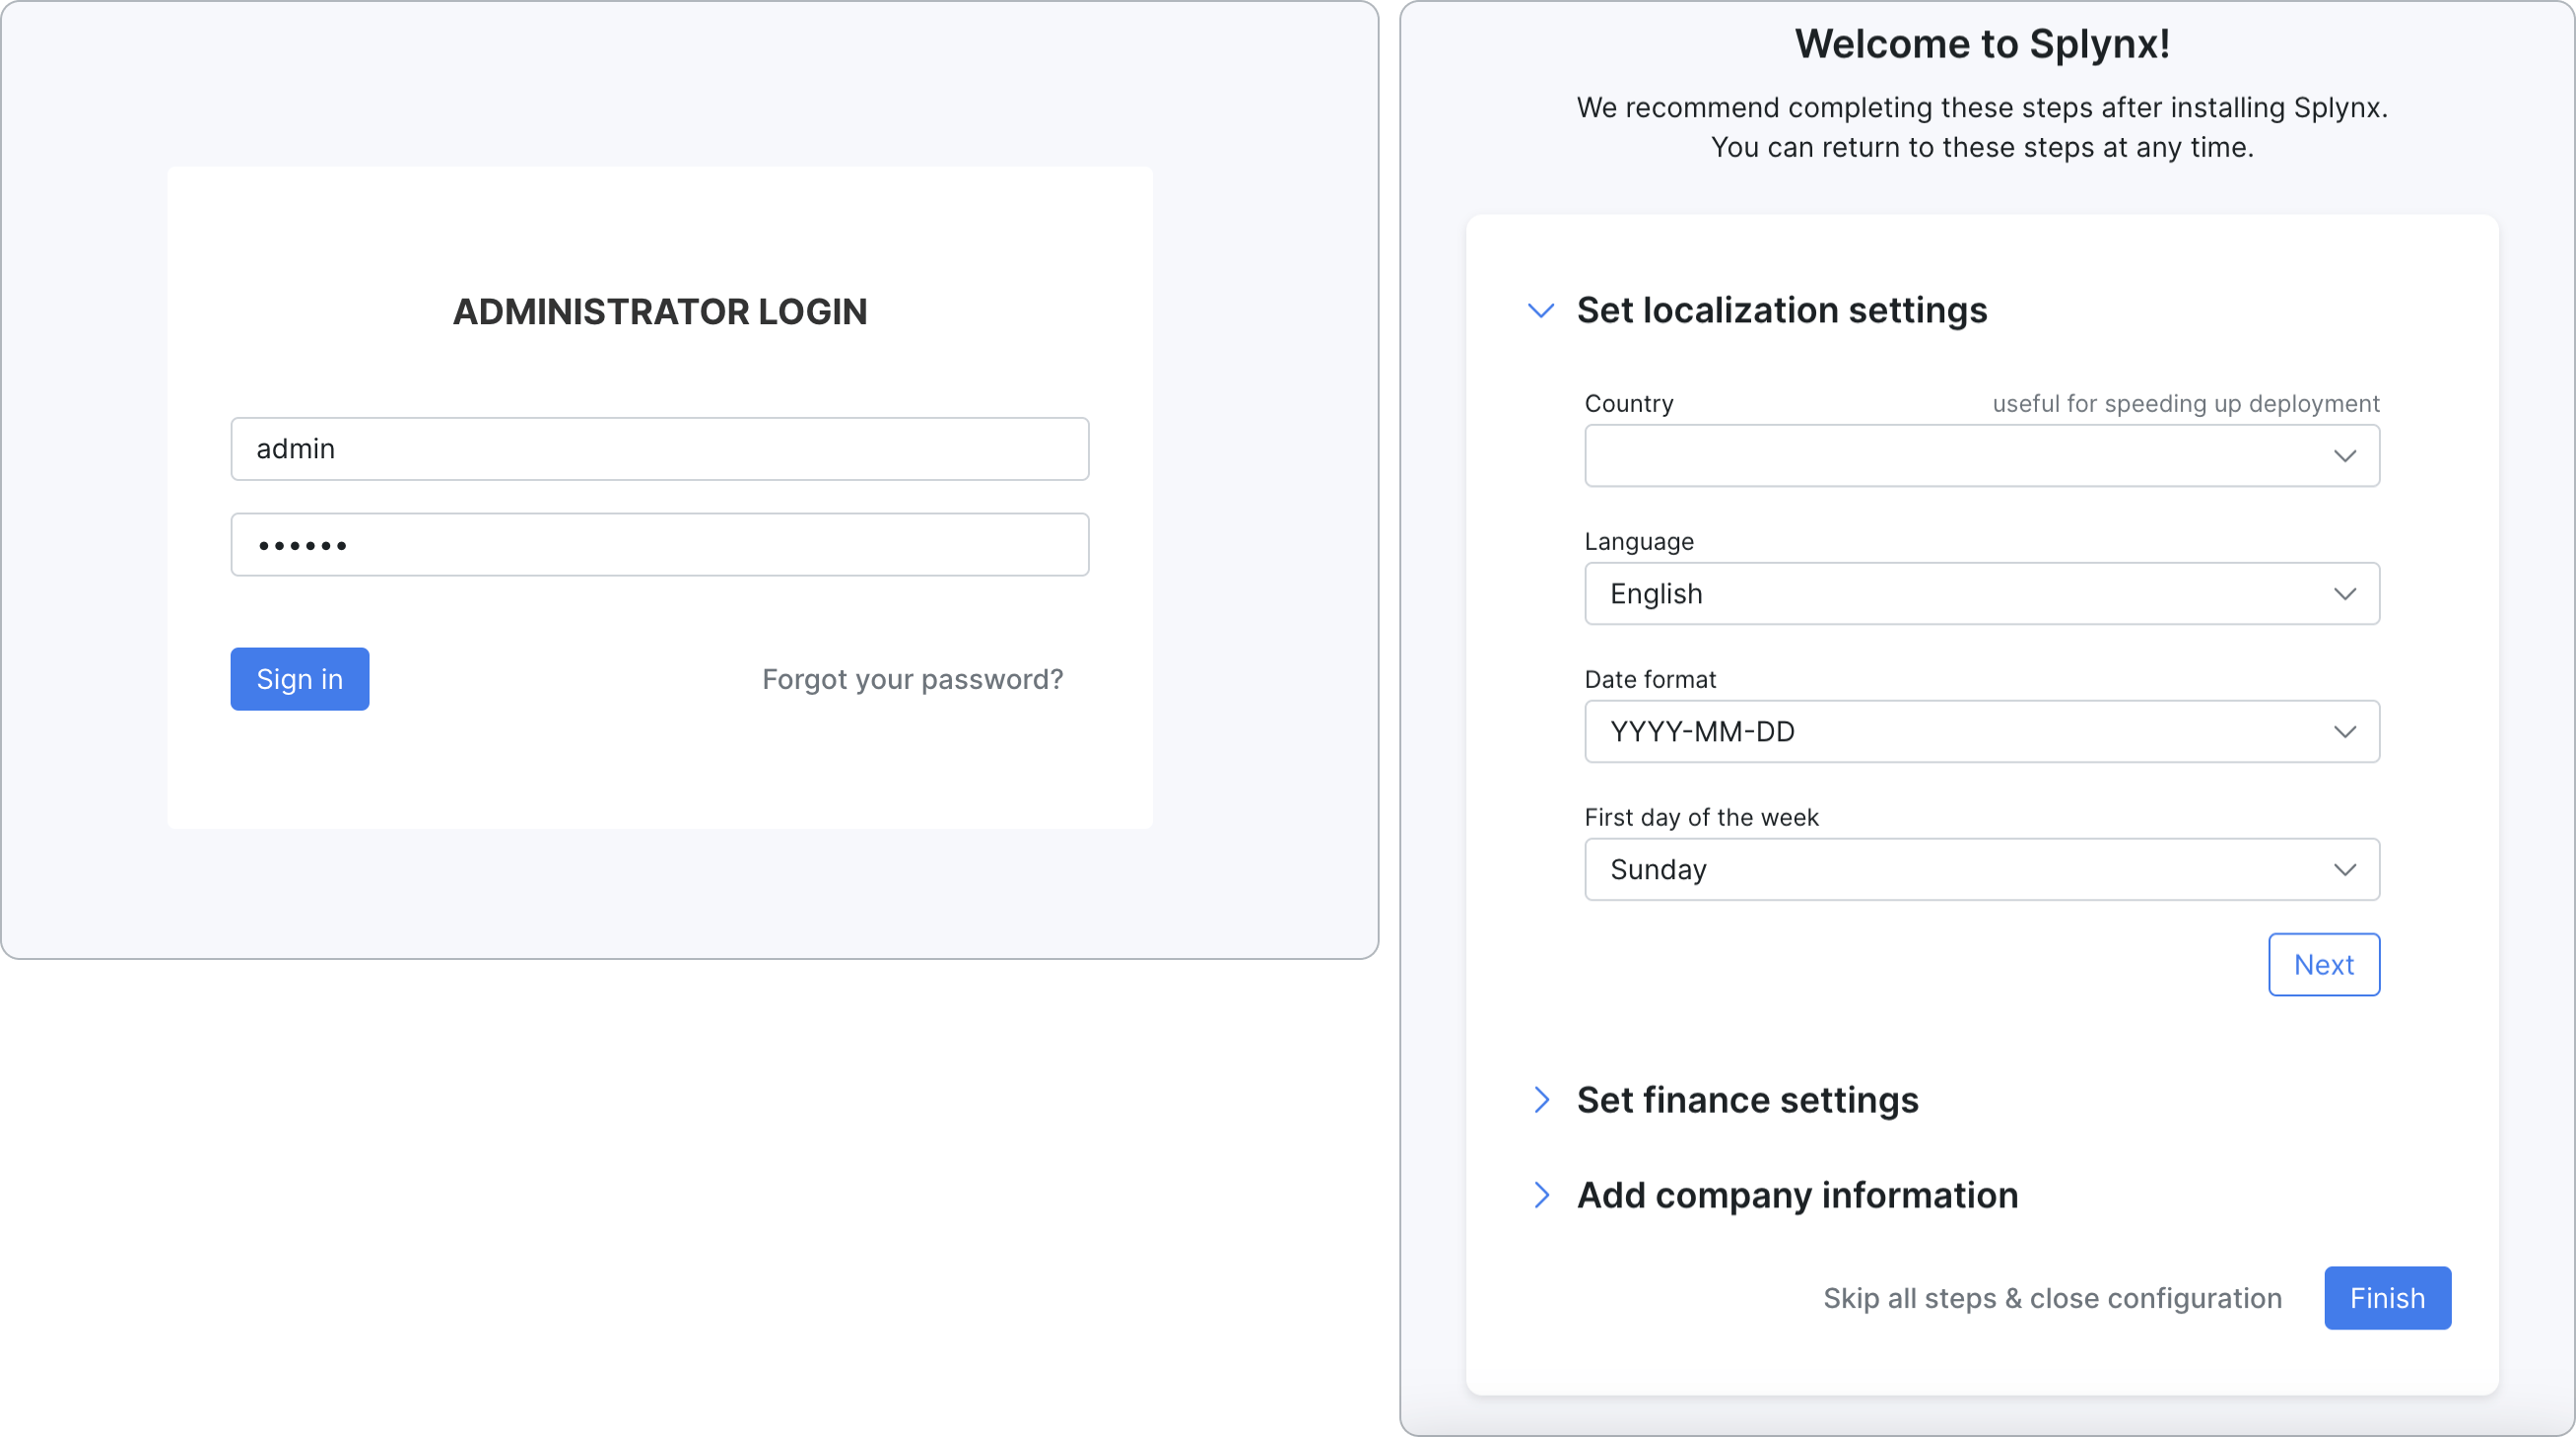
Clicking on this link will initiate the installation wizard. Please follow these steps during the setup:

  • OTP Verification: Verify your phone number. An SMS with a one-time password will be sent to you.
  • Server Location: Choose your preferred server region.
  • Domain Address: Enter your domain address.
  • Time Zone: The time zone is detected automatically. Please confirm it is correct.
  • Administrator Password: Create a password for your administrator account.

Splynx installation process

The installation is automated and typically completed within 5-10 minutes. It runs in the background, allowing you to close the window. Once finished, you will receive an email with a link to your server and account credentials.

Step 3: Server login and initial setup

  • Log in to your server using the provided credentials.
  • Complete the initial setup to ensure all important stages are addressed. Alternatively, you can skip this step and finalize settings later on the configuration page.

Splynx first configuration steps

Find out how Splynx helps ISPs grow

Learn more